Friday, January 27, 2012

Italian Garden Chicken


Italian Garden Chicken

We all need more quick meal ideas.  Especially those that look a little fancy - like you've been in the kitchen for hours.  

In fact, gentlemen, in case you need yet another reminder, Valentines Day is coming up.  Even if you don't cook, this is a great meal to pepeare for your sweet!  She will love it!  You do not have to tell her that I came up with the recipe.   Go ahead, guys, take the credit!  I'll never tell.   ;.)

Since there is no onion or garlic in this recipe, it's perfect for "date night." Wink, wink, nudge, nudge.

It's thin sliced chicken breast seasoned with salt, pepper and oregano, braised with vermouth-soaked sun dried tomatoes, artichoke hearts, capers and lemon juice, topped with a reduction made with -- you guessed it, more vermouth!

Steam a few green beans like I did here, and you've got dinner in no time flat!

Here is tonight's easy and healthy recipe:

Italian Garden Chicken

Serves 4

8 thin sliced Chicken Breasts (approximately 1  1/4 pounds)
Salt, to taste
Pepper, to taste
1 tablespoon dried Oregano
1 cup Julianne Sliced Sun Dried Tomatoes (not oil packed)
2 cups Extra Dry Vermouth, divided

Butter Flavored Cooking Spray2 tablespoons Olive Oil, divided
Juice of one medium Lemon12 Artichoke Heart Quarters (packed in water), halved
1 tablespoon Capers, rinsed and chopped
2 tablespoons Cold Butter

Optional:  Italian Cheese Blend for passing at table

Preheat oven to 350 degrees.

Season chicken with salt, pepper, and oregano.

Reconsitute sun dried tomato in one cup of the vermouth by heating it slowly on the stove.  The wine should reduce by half and the tomatoes should plump slightly.

Spray skillet with cooking spray.  Heat until smoking hot.  Add 1/2 tablespoon of the olive oil.


Working in batches, add two chicken breasts to the pan.  Brown on both sides, about 1 1/2 minutes each side.

Remove to a baking dish, also sprayed with cooking spray.  Repeat process with remaining chicken breasts.

Pour sun dried tomato mixture over chicken.  Add lemon juice. 

Bake chicken for approximatley 8 or 9 minutes until the chicken is completely cooked and juices run clear.

Remove chicken from oven and keep warm.

Pour the sun dried tomato and pan juices into a sauce pan along with the remaining cup of vermouth.  Add artichoke hearts and capers to pan.  Bring to boil and reduce to simmer, approximately three or four minutes until mixture reduces. 

Add cold butter one pat at a time to thicken the sauce.

Spoon sauce over chicken.


Cheese is optional.


A Simple Baked Cod with Tuscan Bean and Green Ragout


A Simple Baked Cod
with Tuscan Bean and Green Ragout

A traditional French ragout was a stew made with or without veggies.  Italians often make this with white beans.  I have no idea if this recipe is traditional, but the name sounds good and it tastes great so what the heck, eh?

Seriously, do you ever have those nights when you make something so darn tasty that you just go – “Man, what did I just do?"

A happy dance ensues!

This dish consists of a simple baked Cod with a sauce of white wine and butter, with mushrooms and cherry tomatoes.  It is served atop Tuscan bean and green ragout made with the most delicious ingredients, including white beans, prosciutto, garlic crushed red pepper and rosemary to name a few. 

If you love fish, you must check this dish out.   I am definitely making this one again very soon.

Serves 4:

For the Cod:

4 – 4 ounce North Atlantic Cod Fillets
Old Bay® Seasoning, to taste
1 cup Button Mushrooms, halved
1 cup Cherry Tomatoes, quartered
1/4 cup dry White Wine
3 tablespoons Butter
Freshly Ground Black Pepper, to taste

Other: 
Butter Flavored Cooking Spray
Fresh Parsley for garnish (optional)

For the Ragout:

2 tablespoons Olive Oil
2 pieces Prosciutto, sliced into strips
¼ cup thinly sliced Celery Heart with leaves
1 small Carrot, thinly sliced
1 medium Shallot, sliced thin
1 clove fresh Garlic, minced
2 teaspoons dried Rosemary
Crushed Red Pepper, to taste
1 – 15 ounce can Cannellini Beans (do not drain or rinse)
Sea Salt, to taste
¼ cup Dry White Wine
1 small bunch Broccoli Rabe, cleaned and stemmed
Freshly Ground Black Pepper, to taste
½ cup shredded Italian Cheese Mixture (Suggest Parmesan, Romano and Asiago)

Preheat oven to 350 degrees.

Sprinkle cod fillets on both sides with Old Bay®.  Place in pan coated with cooking spray.

Add mushrooms and tomato to pan.  Add wine and dot the butter around the baking dish.  Top with black pepper.

Bake for 15 – 20 minutes until fish flakes.


For the ragout:

Add olive oil to pan.

Add prosciutto.  Cook for five minutes over low heat until the fat is rendered.

Remove prosciutto to bowl and reserve.

Add celery, carrot and shallot to pan.  Sauté over low heat for five minutes.

Add garlic, rosemary, and crushed red pepper.  Cook for one more minute.

Add beans and bean juice.  Stir in salt, pepper and wine.  Mash beans in the pot using the back of a wooden spoon, about two or three minutes, until some of the beans "melt" into the sauce making it thick.

Return Prosciutto to pan.

Simmer at least 15 minutes over low heat. 

Wilt in Broccoli Rabe. 

Top with freshly ground pepper.

Note:  If sauce is too thick, you can add another splash or two of wine.

Simmer over low heat for a few more minutes.

Stir in cheese mixture.


Plate Ragout under Cod.  Top cod with tomatoes, mushrooms and a little of the wine and butter sauce.

Garnish with fresh Parsley.


Wednesday, January 25, 2012

Hypoglycemia and my Chicken Ragù

Okay, a serious post tonight.  No joking around.  This is serious food.

Cavatelli with Chicken Ragù

You might have noticed that I have shown several pasta sauces including meat.  I love pasta, but I am severely hypoglycemic.  I was diagnosed a couple of years ago after I got extremely shaky at a cooking event.  At first I chalked it up to nerves, but later I found out that a combination of the wine I had the night before at the pre-party, the white bread I had with my dinner that same night, followed by skipping breakfast before the cook-off and the intense heat that day was a recipe for disaster.
When I have a hypoglycemic attack, I do it big.  I’ve been known to tremble uncontrollably.  I get blurred vision (dancing spots in front of the eyes).  I sometimes feel faint, and I have the occasional unexplained mood swing – the hubby just LOVES it when that happens.  

Seriously, hypoglycemia can even mimic depression in some people.  If you think you might even remotely have blood sugar issues, PLEASE, see your doctor!
Because of my condition, when I eat pasta, my doctor suggests that I include protein with the meal.  By doing so, I can even treat myself to a slice of garlic bread. 
If you’re watching your weight, you don’t want to necessarily have beef or pork with the pasta all the time.  I like to make pasta sauces with ground chicken.  Ground chicken has less than 50% of the fat of ground beef.
Even if you don’t share my health issue, you might just like a big old bowl of meat sauce. This is sure to satisfy without packing on the extra pounds.

Shave carrot with your vegetable peeler!

I never really understood the difference between Ragù and Bolognese. After doing research on several different websites, I learned that bolognese is ragù done in the “style of Bologna.” It typically includes milk, which is what I use when I normally make meat sauces, to soften the acidity. 

No milk in ragù.

Conduct a Google search on ragù and you find so many different variations.  Many of the recipes call for celery, carrot and onion.  I didn't have any celery so I left it out.  You can certainly add it here.  I shaved the carrot using my vegetable peeler. 

I used both rosemary and crushed red pepper in my recipe.  And while I like making my own sauce from scratch for freshness (plus I can control the amount of sugar added), tonight’s recipe uses a combination of fresh and store bought ingredients; perfect for a busy weeknight.  It only takes an hour to cook.  You could even put this together in the morning and then tranfer it to a slow cooker.


Cavatelli

I selected Cavatelli because I learned from Mama Pirri that this pasta is not only great served with broccoli rabe, it also goes well with thick, hearty sauces.  Mama Pirri was correct.

With no further adieu, I bring you tonight’s healthy recipe:

Cavatelli with Chicken Ragù

½ pound Cavatelli, cooked per package directions
1 1/2 tablespoon Olive Oil
1 large Shallot, thinly sliced
2 cloves Fresh Garlic, chopped
1 medium Carrot, shaved
1 pound Ground Chicken
Pinch or two of Coarse Sea Salt, to taste
Freshly Ground Black Pepper, to taste
½ tablespoon dried Rosemary
1/4 cup dry or extra dry Vermouth
1 24 ounce Jar Original Red Spaghetti or Marinara Sauce
Pinch or two of Crushed Red Pepper, more or less to taste
Grated Romano, Parmesan and Asiago Cheese Blend for topping (optional)

Prepare pasta per package directions.

Add olive oil to skillet.  Add shallot, garlic and shaved carrot.  Sauté for three minutes until softened, being careful not to burn the garlic.

Add ground chicken.  Brown for approximately five minutes. 

Add salt, pepper and rosemary.  Cook for one more minute.

Add Vermouth wine and let it evaporate - about one minute - scraping the browned bits from the bottom of the pan.

Add pasta sauce and crushed red pepper.  Simmer for about one hour until the flavors marry and the sauce thickens.  The carrot should "melt" into the sauce. 

You can cook this sauce lower and slower if you desire.  The longer, the better. 


Serve sauce over pasta.  Pass cheese at the table.


Note:  This recipe was tested using Francesco Rinaldi ® Original Traditional Pasta Sauce. 

I had never eaten this sauce before.  I purchased it as it was inexpensive, and it's been on the market for over thirty years.  I found the flavor spot-on for this dish. 

No product was supplied to blogger and not a paid endorsement.

If you liked this post, you might also enjoy -http://welcometojustforcooking.blogspot.com/2011/09/gnocchi-and-gorgonzola-pie-with-sunday .

Mushroom Stuffed Pork Roast with a Balsamic Wine Reduction in Cartoon

Blogger's Note:  If you are wondering what happened to the braciole and the Cabbage Pasta recipes, well... I had a little technological glitch; more like blonde operator error.  I recently went up on the "new" blogger interface.  I was playing around with a few things this weekend and... whoops - delete! 

Fortunately, I could recover the braciole from a cached copy.  However, the pasta, I was not so lucky.  If you are looking for that recipe, please email me and I'll send it to you.


Mushroom Stuffed Pork Roast
with a Balsamic Wine Reduction

I think I'm a pretty good home cook and a creative recipe writer.  Many of you who frequent my blog have told me that you come for the creative ways that I put meals together, and I appreciate that. 


Dan and Me in Savannah, 2010, all Avatar-Like
PS - Before I lost more weight...
I also hated my hair back then.  LOL!


When it comes to plating, I often feel like the the William Hung of the blogger world.  Remember that guy on American Idol a few years ago who tried to sing like Ricky Martin?  


When I teach presentation skills, I often tell my students to "state the obvious."  Like William, I will do just that.

I've had no formal training in plating food. 

Yeah, okay, Mary Kay.

On the flip side of where is the reality in life - I actually read a chef's post the other day and she said, "If the food looks excellent, it doesn't have to be that good." 

Really?  Really? 

As I said last week in my less-than-perfectly rolled chicken stuffed cabbage post, I get the whole "eat with your eyes thing."  Yes, plating is important and I do respect the whole food styling industry.  I want to learn how to do it properly.  I aspire to be you some day but... ummm... remind me not to go to that chef's restaurant. 

Nuff said. 

Tonight's recipe  is another rolled meat dish.  I love meat.  I like rolled meat dishes. 

I think I did okay with the plating.  I mastered the "clock" technique.  You know, put the meat at 2 and the starch at 10 and whatever green at 6.    In hindsight, I should have steamed the baby carrots and zucchini instead of roasting so the carrots, especially, would have that cute green root thingy on top. 

However, these are fantastic roasted.   I highly recommend it.  ;.) 

Seriously, the chef-y plating attempt aside, this dish is wonderful.  It's roasted center cut pork, stuffed with mushroom, rosemary, ground sage and a mixture of bread crumbs and cheese.   I served it with a simple balsamic wine reduction.

Yes, this is animated, too. 
Attack of the GIANT carrot!


If you like this recipe, make it and then send me a picture via email of how you plated it (no attachments - please send the picture in the email).  My email address is under the contact tab.  You just might make a food stylist out of me yet, my friends.
So, to make a long-winded blog short, since I'm still learning and I wasn't happy with tonight's pictures, I decided to bring them to you in cartoon.  HA!
Just think of this as an animated version of what could be on your plate.


Mushroom Stuffed Pork Roast
with a Balsamic Wine Reduction


For the Pork and Stuffing
1 - 2 pound Center Cut Pork Roast, butterflied
2 tablespoons Olive Oil, divided
1 tablespoon Butter

1 cup thinly sliced Mushrooms
1 teaspoon dried Rosemary
1/4 teaspoon ground Sage
1 6 ounce Package KRAFT Fresh Take Rosemary and Roasted Garlic Recipe*
1 tablespoon Philadelphia Brand Savory Garlic Cooking Creme
Italian Seasoning, to taste
Lawry's Season Salt, to taste
Fresh Ground Pepper, to taste


For the Sauce
Pan Drippings
1/4 cup dry Red Wine
1 tablespoon Balsamic Vinegar
1 tablespoon Butter
2 tablespoons Philadelphia Brand Savory Garlic Cooking Creme

Other:  Butcher's Twine


Preheat oven to 365 degrees.

Add one tablespoon of the olive oil to a skillet.  Melt butter in pan with oil.  Saute mushrooms until browned.  Add the rosemary and the sage to the mushrooms.  Remove from heat and cool.

Add remaining olive oil to the KRAFT breadcrumb and cheese mixture.  Fold in cooked mushrooms.  Add one tablespoon of the cooking cream.  Mix.   You should have a tight, almost paste texture to the mixture.

Spread mixture on butterflied pork roast.  Roll roast and secure with butcher's twine.
Rub roast with Italian seasoning, seasoned salt and pepper.  Add roast to roasting pan with rack, fat side up. 

Note:  Root vegetables can be added to the pan with the roast if making. 

Bake rolled roast for one hour.

For the Sauce:

Add wine to pan drippings and deglaze.  Add Balsamic, the butter and stir in the cooking cream.  Reduce for one minute over medium heat, stirring constantly. 

Plate sauce with roast.


Sunday, January 22, 2012

Braciole Stuffed with Mozzarella and Radish Greens

Here is another meal that looks (and sounds) fancy, but you can make this on a budget;  fusion cuisine -- down-home American country cooking meets the Italian countryside. 


Braciole Stuffed with Mozzarella
and Radish Greens
served on 
Cheesy Egglpant Patties
with
Eggplant and Ripe Olive Marinara

I was talking online to another blogger recently.  I told her that I was terrified that I would gain back my weight when I was going through my medical procedures last year because I wasn't able to do my regular workouts for given periods of time.  But by walking and cutting calories, I was able to not only keep it off, but I lost more once I got back on my routines.

The moral of that story is, eat less - move more really works, even you can only move a little.

That conversation inspired tonight's recipe. 

I purchased those packaged beef tenderloins, marinated in a light mushroom marinade.  We found that the meat didn't have much flavor. 

Since we are on a very tight budget these days, I plan all of my meals for the entire week.  I decided to use the meat in a Braciole recipe. 

"Waste not, want not."  I don't know who said that, but it applies very much so today!

I picked up a package of Prosciutto earlier in the week to make traditional braciole.  I decided not to use it so I could make this recipe even lighter.  

Then --  I got a crazy idea -  along with the creamy Mozzarella, I would "kick it up a notch."


I added radish greens.  


Radish greens?  Yes!   

And, no, I haven't gone all Daisy Duke on you.  Heck, I still couldn't fit into those shorts if I tried!  Not even one leg!!!

Radish greens; beet greens -- all those can be washed, sautéed and consumed.  If you don't have or want to use radish greens (yes, they do look wilted from the get-go), you can certainly opt for perky green Arugula.  However, the radish greens are much cheaper and you get whole bunch of radishes you can add to your salad all week.

As the old TV commercial once proposed, "Try it, you'll like it."


The Eggplant Patties are coated with this new Kraft Product which I found.  I used some in the braciole and the rest for the eggplant.  I normally don't by these packaged mixtures but considering what was in this package, it's a good value.  

I deviated from the recipe on the back of the KRAFT box.  I used cooking creme and egg mixture to wet the eggplant before coating and... wow!   

If you are vegetarian, you might just consider making the eggplant and topping it with the sauce.   These eggplant patties are that good without any added cheese!

Note:  You can also use pounded Round Steak for this recipe.  You will need to increase the cooking time by 15 minutes to ensure tenderness. 

Serves 4

1 packaged Beef Tenderloin, plain or lightly marinated, (about 1 1/2 pounds), butterflied and pounded thin
4 sandwich-sized slices of Mozzarella Cheese
3 tablespoons Olive Oil, divided,  plus extra for drizzling
1 tablespoon bottled minced Garlic
2 bunches of Radish Greens or Arugula, washed and stemmed
1/4 teaspoon freshly grated Nutmeg
Salt, to taste
Pepper, to taste
1 6 ounce package KRAFT Fresh Take Rosemary and Roasted Garlic Recipe*
1 teaspoon dried Rosemary
1 Eggplant, sliced into 8 slices with the remaining chopped into bite-sized pieces
12 black olives, sliced
1 24 ounce jar Marinara Sauce
3 tablespoons Philadelphia® Brand 1/3 Less Fat Savory Garlic Cooking Creme, (1 tablespoon reserved)*
1/4 cup Egg Whites, beaten
1/4 cup dry or extra dry Vermouth

Other:

Cooking Spray
Butcher's Twine

Preheat oven to 350 degrees.

Cut cheese slices in half and lay them across the width of the pounded steak.

Add one tablespoon of the olive oil to a skillet and the minced garlic. 

Sauté greens until wilted.  Add nutmeg, salt and pepper.


Spread greens out on top of the mozzarella cheese.

In a small mixing bowl, add four tablespoons of the KRAFT breadcrumb and cheese mixture and the extra rosemary.  Drizzle the remaining tablespoon of olive oil onto the mixture and combine until coated. 

Spread breadcrumb and cheese mixture over the braciole. 

Roll meat, short side in, and tie with butcher's twine.

Add olive oil to an oven safe pan.  Brown meat on all sides.


While meat is browning, combine the Marinara sauce with two tablespoons of the cooking creme and 1/2 of the vermouth.  Heat over low heat.

Once the meat is browned, add the remaining vermouth to the pan.  Add a cup of the sauce on top of the meat.  Cover and bake for one hour.

While meat is baking, whisk the remaining tablespoon of the cooking creme with the egg whites.  Dip each slice of eggplant into the into the cooking creme and egg mixture and then PRESS the breadcrumb and cheese mixture into both sides of each slice of eggplant.  Spray slices with cooking spray. 

Add chopped eggplant and olives to remaining Marinara sauce and warm through.

After one hour, uncover the braciole.  Add the eggplant to the oven. 

Bake both dishes for 15 minutes. 


Turn eggplant in pan.  Continue to bake both for another 15 minutes.
Remove braciole from oven and let rest.  Turn on the broiler.  Drizzle the eggplant with a little olive oil and broil until browned.

To serve:  Plate sauce.  Top with two slices of eggplant.  Top each slice of eggplant with a slice of the braciole.  Drizzle with more sauce.

TIP:  Shop for your produce at a local farmer's market or farm stand for better value and fresher veggies.

*No product was supplied to blogger and not an endorsement.

Tuesday, January 17, 2012

Sunset Crab Cakes

Sunset Crab Cake Appetizer

If you love crab, you might just also love crab cakes.  Tender and moist on the inside, and crispy on the outside, there are as many different recipes as there are coastal regions of the United States. 

I call these "Sunset Crab Cakes" because they remind me of the 15 years I spent living near Clearwater Beach.  A white, sandy beach on the Gulf of Mexico, it is one of the best places to watch a sunset and to eat great seafood.

This recipe makes six crab cakes.  You can double or triple it as you like.  My only caution is not to overcrowd your pan so you have room for turning. 

Brown the cakes lightly or brown them more -  it's personal preference.  I have examples of both here and you can see they look equally as beautiful and trust me, they taste great either way!

The process that I use involves slightly "freezing" the cakes so that they are easier to handle.  That's because I use very little cracker crumb.  I like my crab cakes to be all about the crab, not the bread.

Are these healthy?  Pan frying is okay if you are watching your weight.  It's all about using a healthy oil.  Vegetable oil is made with soybean these days. 

Economical?  You betcha!  I used canned crab, which you can find in the canned seafood aisle of your supermarket. 

So whether you are serving these as an appetizer or a main course, you can look like a rock star even if you are on a tight budget.


Sunset Crab Cakes as an Entrée

Sunset Crab Cakes

For six cakes you will need -

2 cans (6 oz) Bumble Bee® Lump Crab meat, drained*
1/4 cup Egg Beaters® All-Natural Egg Whites*
3 tablespoons Light Mayonnaise
1/2 tablespoon Old Bay® Seasoning*
1/2 teaspoon Anchovy Paste
1/2 teaspoon Cholula® Hot Sauce*
1/4 cup Celery, minced
1/4 cup Green or Red Bell Pepper (or a combination), minced
1/8 cup minced yellow Onion
1/2 cup Town House® Buttery Wheat Crackers, crushed*
1 teaspoon dried Dill Weed
2 teaspoons Lemon Juice
Butter Flavored Cooking Spray
1/8 cup Soy Bean (Vegetable) Oil

Add crab to medium mixing bowl.  Gently fold in egg whites, mayonnaise, Old Bay, anchovy paste, and hot sauce.

In another bowl, combine celery, bell pepper, and onion. 

Crush crackers and add dill weed. 

Carefully fold the crab with the vegetables and the cracker and dill weed.    Add lemon juice and give the mixture a quick toss. 

Form into six even-sized cakes.  Place cakes on parchment paper laid on a freezer-safe plate. Top with another sheet of parchment paper. 

Refrigerate cakes for at least one hour.  More if you have the time.

1/2 before you are ready to cook the crab cakes, transfer the plate to the freezer

Crab cakes should be firm to the touch and near frozen when you are ready to drop them into the hot oil.


To cook the cakes:

Spray skillet with cooking spray and add oil.  Heat oil until it "pops." 

Add crab cakes - three at a time.  Cook on one side for five minutes; flip, and continue to cook for another five minutes.

Remove cooked cakes, plate, and keep warm. until ready to serve. 

Repeat cooking process with second batch. 

If you are cooking more than two batches, I suggest that you change out the oil or have two skillets going as not to have too much of the "break-off" from the crab cakes  which is sure to occur.  ("Break-off" is the excess bits of the cakes which naturally break off as you fry).

PS -  That is not a technical cooking term, but you get what I mean.

Keep in mind, the second batch might cook a little quicker as the oil is hot, creating browner crab cakes.


Notes:

The sauce I made is a simple mixture of light mayonnaise, hot sauce and lime juice. You can play around with the proportions until you get the flavor that you enjoy.

Also, pick your herb topping. For the entrée portion I used fresh chopped chives. For the appetizer I used parsley. Whatever you have on hand is just fine.

*I listed these brands as the recipe was tested with these and they have a certain quality or flavor.  No product was supplied to blogger and not an endorsement.

Monday, January 16, 2012

Chicken and Brown Rice Stuffed Cabbage Rolls

“The only real stumbling block is fear of failure. In cooking you've got to have a what-the-hell attitude.”    ― Julia Child

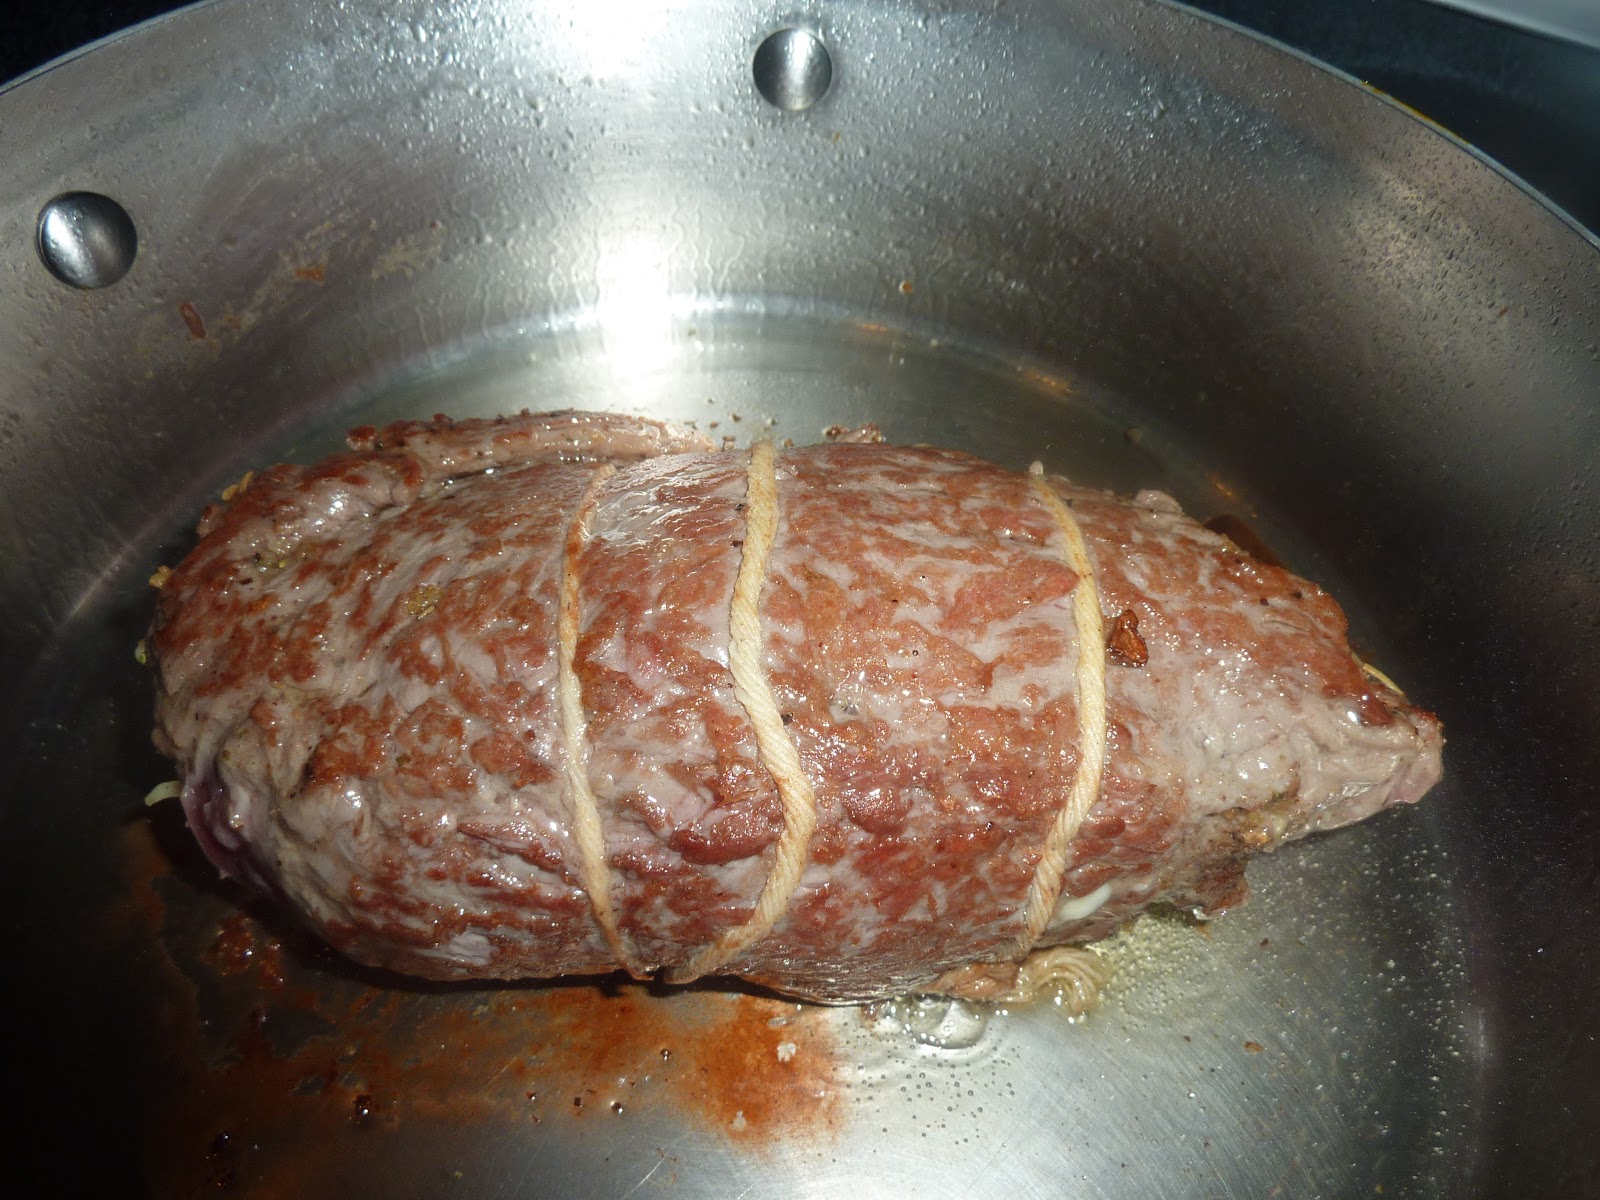
My less-than-perfectly wrapped cabbage rolls
are delicious AND healthy!

You know, the sign of an honest food blogger is a person whose food DOESN'T always come out picture perfect, and he/she is not afraid to show it to the world.  I know we "eat with our eyes" first but heck, if it tastes good and it fills you up, that's all that really matters, right? 

This recipe tastes fantastic!  It's very economical!

Comfort food gets us through the roughest times.  Whether you had medical procedures like I did this past year, or just have fallen on hard times, a meal like this can really make you smile when you're feeling down.  When it's healthy, all the better because you don't pack on the pounds which can cause other issues in your life.  Stuffed cabbage is total comfort food!

That being said, I am a Slovak/Ukrainian girl by heritage.  You'd think I'd know how to roll a decent stuffed cabbage.  Fact is, I don't make them all that often because my rolling technique is less than perfect, and they take a lot of time.  But I have been so hungry for this Eastern European delight that I had to break down and make some in spite of my cabbage-rolling phobia...  especially with the cold snap we're having down here.

My grandma, Susie, made the absolute BEST stuffed cabbage I ever ate. She would let it braise all day long in a big pot on top of her stove.

My mom always baked her stuffed cabbage. Like me, mom always got the "flavor" down but never Susie's rolling technique.  Mom gave me one great tip; patching. You take little bits of cabbage and patch up the holes if you can't get it just right. By the time it cooks, nobody really knows the difference. Okay, maybe they do but who cares when you're about to dig in?  You are going to end up putting the kraut on the potatoes anyway.   Admit it.  You are!  Why not just serve this family style and let everyone have at it? 

I guarantee you, my Aunt Kata never "plated" stuffed cabbage; it was every man, or woman, for themselves!

And yes, I used that "well-seasoned" 50 plus-year-old roaster with the one handle missing on the rack.  You've seen this pan before in my posts.  It was my mom's, so it's dear to me.   

You'll notice that I call for a "non-reactive" roasting pan because of the tomato in the recipe. This pan is most likely radio active, as it's so old and stained, but every batch of stuffed cabbage Mom ever made was prepared in this roaster.  Every New Year's Day Pork Roast has been made in this pan since before I was born.  I continue the tradition!


Don't laugh!  I tried!

I used a tip which I received from a fellow food blogger, Steve, over at The Black Peppercorn.  I posted the link to his traditional and properly rolled recipe below.  Thank you Steve. 

Steve freezes the cabbage instead of steaming it.*  I found that this really worked.  The only trouble was I think my cabbage was a little too. - ummm - tightly wrapped.  I had a cabbage that needed therapy?  Well, no.  The outside doesn't always match what you get on the inside - I guess that's true with people too, yes?

I digress -

My quest was to make this recipe lighter.  I used ground chicken and brown rice. 

Now, I won't kid you - there is NOTHING like the original stuffed cabbage and I encourage you to pop on over to Steve's blog and check out his recipe.  Mine looks very "rustic" compared to his.  But this -- this is one great way to satisfy the craving yet keep the calories and fat even lower, not to mention the health benefits of the brown rice.

This recipe yields approximately 14 cabbage rolls:

1 cup Instant Brown Rice
2 cups Low Sodium Chicken Broth
2 tablespoons Butter
1 tablespoon Olive Oil
1 1/2 pounds Ground Chicken
1 tablespoon Garlic Powder, plus a teaspoon more, divided
1 tablespoon Onion Powder
2 tablespoons dried Oregano, plus a teaspoon more, divided
1/2 tablespoon Salt
1/2 tablespoon Black Pepper
1/2 tablespoon Paprika (I used Spanish)
14 Cabbage Leaves, core removed and separated, plus two cups chopped Cabbage*
1 cup Diced Tomato with Oregano and Garlic
23 ounces Tomato Juice
1 teaspoon Caraway Seeds (optional)
1 27 ounce can Sauerkraut (I don't drain it for this dish)

Other:  Butter Flavored Cooking Spray

If using frozen cabbage, defrost at least 8 hours before using and core.

If steaming cabbage, steam leaves only one hour before cooking for about 10 minutes until softened.  Let cabbage cool. 

Prepare rice using the chicken broth, butter and olive oil per package directions, except do not add any salt.  Note that the extra oil keeps the rice from sticking together.

Let rice cool.

Preheat oven to 350 degrees.

Combine prepared rice with ground chicken, one tablespoon of the garlic powder, the onion powder, two tablespoons of oregano, salt, pepper and paprika.  Mix together well.  Make 14 even-sized ovals out of the mixture and place one end of the cabbage, rolling and tucking the sides into the ends.

Place rolls in the bottom of a non-reactive roasting pan sprayed with butter flavored cooking spray.  Top with chopped cabbage.


Top the rolls and cabbage with the cup of tomato, the tomato juice, the remaining garlic powder, oregano, and the caraway seeds.

Cover with lid of roaster or tin foil.  Bake for one hour.

Add sauerkraut and kraut juice to pan on top of cabbage.

Bake, uncovered, for forty-five more minutes. 


Baste kraut with juices from pan.  Increase heat to 375 degrees.  Once the heat has risen, bake, uncovered, for another ten minutes until kraut is lightly browned. 

Remove from oven and cover for at least fifteen minutes before serving.


Total "comfort food"
when served with skinny mashed potatoes!

Want a thicker sauce?  Whisk in a tablespoon of cornstarch into the tomato juice before topping the rolls and cabbage. 

Suggestion:  Serve with skinny smashed red potatoes flavored with Horseradish.