Showing posts with label side dishes. Show all posts

Tuesday, June 3, 2014

Chipotle Teriyaki London Boil


Can you believe this London Broil is medium rare, and it's been cooked twice?
Check out my grilling technique!
                                     
These are the kinds of recipes that I love to bring to you -  here you are getting not one, but two meal ideas using the same cut of meat, as well as a simple side dish.

Grilling is one of my favorite things to do in the summer.  A couple of years ago, we had a gift certificate for a hardware store and we decided to go get ourselves one of those double grills; one side is gas, the other is charcoal.  I've been having all kinds of fun with it.

Living in Florida, we can grill all year round.  In the summer, I don't like heating up the house with the oven if I can help it.  So I fire up the grill.  Today I'm am bringing you a great (easy) recipe for London Broil. 

Let's talk about London broil:

London broil isn't a cut of meat; it's a style of cooking.  Most often it's thick cut flank steak or tri-tip, but you might just find it's any cut of meat that is less tender.  Check with your butcher to see what cut they market as "London Broil" in your store.  You might be surprised that it is actually sirloin or round.
 
What I love about this recipe is that you can actually get two meals out of it.  You can marinate it and grill it up one day, leaving the center kind of rare.  In fact, what I am showing you here is the re-do (day two) - yes, leftovers.  I wanted you to see how nicely the meal grilled up the second day (even if you like it medium rare like we do).

I first grilled this up on Saturday night.  On Monday, I used it to make this fabulous dinner.  Talk about a time saver on a busy weeknight!
 
I'm showing off my London broil recipe over leftover smashed potato salad mixed with fresh spinach and Dijon mustard (I also added a little spring onion to the leftover potato salad) and I served it with grilled Vidalia onion packs - yum, yum and more yum! 

Got to love this time of year when the Vidalia onions are for sale. 
 
This recipe is also great on top of a fresh Caesar salad.  In a future post, I'll share a great Caesar dressing with you. 

But the bottom line is, this is an excellent meal to prepare with any type of summer veggies. 
 
So fire up the grill!  Here we go:
 
Ingredients:
 
2 – 2 1/4 lb. London broil (thick cut flank steak or tri tip)

For the Marinade: 
1 tsp. Teriyaki sauce
1/8 tsp. grated ginger
1/2 tsp. salt free Chipotle seasoning
2 cloves garlic, minced
Dash of rice vinegar
1 tbs. canola oil, plus extra for bushing  

Other:
Grill seasoning for steak
Cooking spray for the grill
Freshly squeezed lime juice for seasoning after grilling (optional)

Directions:

Add the meat to a container.  Combine the Teriyaki sauce, ginger, Chipotle seasoning, garlic, rice vinegar and canola oil.  Marinate under refrigeration for at least 2 -3 hours; longer if you have the time.

When you are ready to grill, bring the meat to room temperature for about 20 minutes.  Pat the excess marinade off with a paper towel.

Bush the meat with extra canola oil or vegetable oil can be substituted.  Rub London Broil with the steak seasoning.  

Note:  Even though there is some salt in the Teriyaki seasoning, I like to add the steak seasoning (which adding salt right to the meat) right before I cook it.  Remember that salt draws the moisture out of the meat - and you don't want your meat to be dry. 

Preheat gas or charcoal grill treated with cooking spray to 400 degrees. 

Rub both sides of the London broil with the steak seasoning.

Grill on one side for about 5 without moving until the sear on the one side.  Turn and continue to grill for about six minutes over direct heat. 

Move the London broil to indirect heat and continue to cook for about 15 minutes each side until internal temperature comes to 145 degrees for medium rare.  The center should still be more on the rare side.    Adjust cooking time accordingly for your grill.

Let meat rest for about 20 minutes before slicing. 

Season with lime juice before serving. 

To reheat leftover London Broil, bring to room temperature for about 30 minutes.  Rub a little extra canola oil over both sides of the meat (you can also add additional steak seasoning or Chipotle seasoning, or a combination of both is you like).

Grill for about four minutes first side, and three on the second until warmed for medium rare (pictured).  Adjust cooking time for your liking.   Note that in this case, you will still have a bit of a cold center.  If you like your meat warmed through, then do your thing and prepare it how you like to eat it. 

There are no definite rules with grilling.  Just like with wine; it's what YOU like that counts!


Okay, so what about the onion?   That is simple - 

I like to quarter small Vidalia onions, leaving the bottom intact so that they form a flower.  Don't cut them all the way through. I spray tin foil with cooking spray.   In the middle I add for each onion -

1/2 tbs. butter
A few shakes of Worcestershire sauce
1/2 packet of concentrated beef broth

Form a foil packets (if not using heavy duty foil, you might need to double wrap like I did here).  I like to grill for 1/2 hour to 45 minutes over medium heat.  I also close the lid to create steam.  You are going to love these!  Try them.

Enjoy, and I'll see you again soon!


Thursday, February 6, 2014

Southwestern Brussels Sprouts


Hello!

The runch crunch finally got me last week.  And I was on antibiotics.  And as a result, I didn't workout.  Which means I didn't lose any weight.  In fact, I put back on a pound.  But as I told my friends on Facebook:  Nobody ever said the road to success was the Autobahn.

I've been told in the past that I don't post enough side dishes.  I love veggies.  We all need to eat more. Well, this dish will even appeal to those of you who will only eat veggies if there is bacon in the dish.  I used turkey bacon.  If you are tracking WW points, this came in at a whopping 3 points, even with the turkey bacon!

So it's good for those nights when you are staying within the guidelines. 

I'm serving it with 4 ounces of pork shoulder seasoned with a an Espresso steak rub (slow roasted) and boiled potatoes smashed with non-fat Greek yogurt, lemon juice and dill.  My entire evening meal came to 11 points.  Of course, you can make lower point options if you've splurged more during the day.  I am not much of a snacker  I probably should be as I know it's good to eat more frequently.

Oh, and as you can see from the pictures in this post and the last, I am rockin' my new Lodge skillet.  It's been dark and rainy until I get around to making/taking the pictures.  Come spring we'll get some nice patio garden pictures again.   

Well, I am rambling, so here  you go!

Ingredients:

2 slice(s) uncooked turkey bacon
1 medium Jalapeno pepper, minced
1/2 tbs. olive oil
1/8 cup sliced scallion, white and light green part
24 ounces uncooked Brussels sprouts, halved
1/2 tbs. fresh lime juice
1/2 tbs. butter
Pinch of Paprika, optional

Directions:

Preheat oven to 400 degrees F.

Add turkey bacon to a large, heavy skillet or cast iron pan.  Cook over medium heat until crispy.  Do not burn. 

Remove the turkey bacon from the pan and place it on a paper towel-lined plate to drain the grease.  Let the bacon sit for  a few minutes to firm up so that you can crumble. 

Add in the Jalapeno to the bacon grease.  If there is too much grease, you can pat the pan lightly with a paper towel to remove the excess.  LIGHTLY sauté the pepper until softened. 

Drizzle in the olive oil and add the scallion to the pan.  Continue to cook for about another minute.

Add in the Brussels sprouts and stir to combine the flavors.  Place the pan into the hot oven.   Bake for approximately fifteen - eighteen (15-18) minutes until the Brussels sprouts are tender and browned to your liking.  You can let it go a little longer is you like.  I will often leave these in for about 20-22 minutes if the Brussels sprouts are larger.  Adjust cooking time for your oven.

Remove the pan from the oven.  Place the pan back onto the stove over low heat. 

Add in the lime juice and the butter.  Once the butter melts, stir to combine the flavors.  Add the paprika, if using, and crumble in the reserved turkey bacon.


You are ready to serve.

And there you go.  A simple side dish I know you are going to love.

See you soon!


Thursday, June 20, 2013

Black Sesame Tuna over Grilled Vegetable Salad


On a hot summer weeknight, you want something easy.  You also want something that won't weigh you down once you decide to hit the sack. 

I love grilling up big bowls of fresh vegetables on the outdoor or indoor grill (on stormy nights) in the summer.  Now, my veggie salad recipe is going to be a bit - eclectic - tonight; meaning you can really do anything you want and this will work.   I'm going to give you suggestions on the seasonings which will pair nicely with the tuna.  From there, you are on your own.

I also recommend this dish or an indoor grill or grill pan so that the sesame seeds stay on the tuna.  If you must drill this outside, do it on a fish pan or tin foil. 

So, here you go:

Ingredients:

For each serving, you will need:

For the Grilled Vegetable Salad:

I used the following, but pick any veggies you like:

Sliced yellow squash
Vidalia onion
Banana pepper
green beans
baby carrots, halved
Fresh tomato, halved

Marinate in:

1 tbs. soy sauce
2 tbs. canola oil
1 tsp. ground coriander
1 tsp. lemon pepper seasoning
Paprika; optional and to taste

For the Tuna:

1 wild caught tuna steak, about six ounces
1/2 tbs. canola oil
1/2 tsp. Wasabi paste
1/2 tbs. black sesame seeds


Other: 
Cooking spray for grill
Fresh chopped herbs (basil, mint, parsley, etc).
Chili oil
Soy Sauce for passing at the table

Directions:

Spray grill pan with cooking spray.

Preheat grill pan to medium-high.

Combine all ingredients for the grilled veggies with the marinade.  Marinate for about 20 minutes at room temperature.  Add to hot grill pan.

Note:  Suggest adding vegetables that take longer to grill first; tomatoes last.  Grill until you get the desired amount of "done-ness."  (Is  done-ness a word?)


Now, for the tuna:


While the veggies are grilling, rub the tuna on both sides with the oil.  Dredge in the Wasabi powder and then the sesame seeds. 

Grill tuna for about three or four minutes each side for rare to medium rare.  Adjust cooking time accordingly for desired temperature. 

Top with fresh chopped herbs.  Drizzle with chili oil and pass soy sauce at the table.

See you soon!

Sunday, June 9, 2013

Easy Like Sunday Morning; Garden Hash


Some of the best dishes come about with little fuss and when you encounter the dreaded, "Oh, no, we are out of..." 

Well, that's what happened this morning.  I had already started the potatoes for breakfast when I realized I had used up all the eggs the other morning when when we were getting ready to visit EPCOT with family.  My father-in-law had free tickets and he treated us to the fun-filled day.  But you know how it is when you are cooking breakfast, trying to get ready and clean the kitchen at the same time.  I barely even recall eating, let alone remembering how many eggs we used. 

So this morning when I went to reach for the eggs, there were none.  But knowing we are going to be eating lunch in a few hours after swimming, we decided to opt for something light.  My husband suggested that I turn these wonderful potatoes into a garden hash. 

Here is a quick recipe that you can enjoy on an "easy" Sunday morning.  You can start with the packaged potatoes that you find in the refrigerated section of your grocery store as they take less time to cook.

Serves 2.

 
Ingredients

1 tbs. Canola oil
10 ounces home style potato slices (store-bought)
1/2 tsp. seasoned salt
Freshly ground pepper, to taste
1/2 tbs. butter
2 medium banana peppers, sliced and seeded
1/8 cup sliced sweet onion
1/8 cup diced tomato
1/2 tsp. dried thyme


Suggested:  Green or red pepper sauce for passing at the table


Directions:

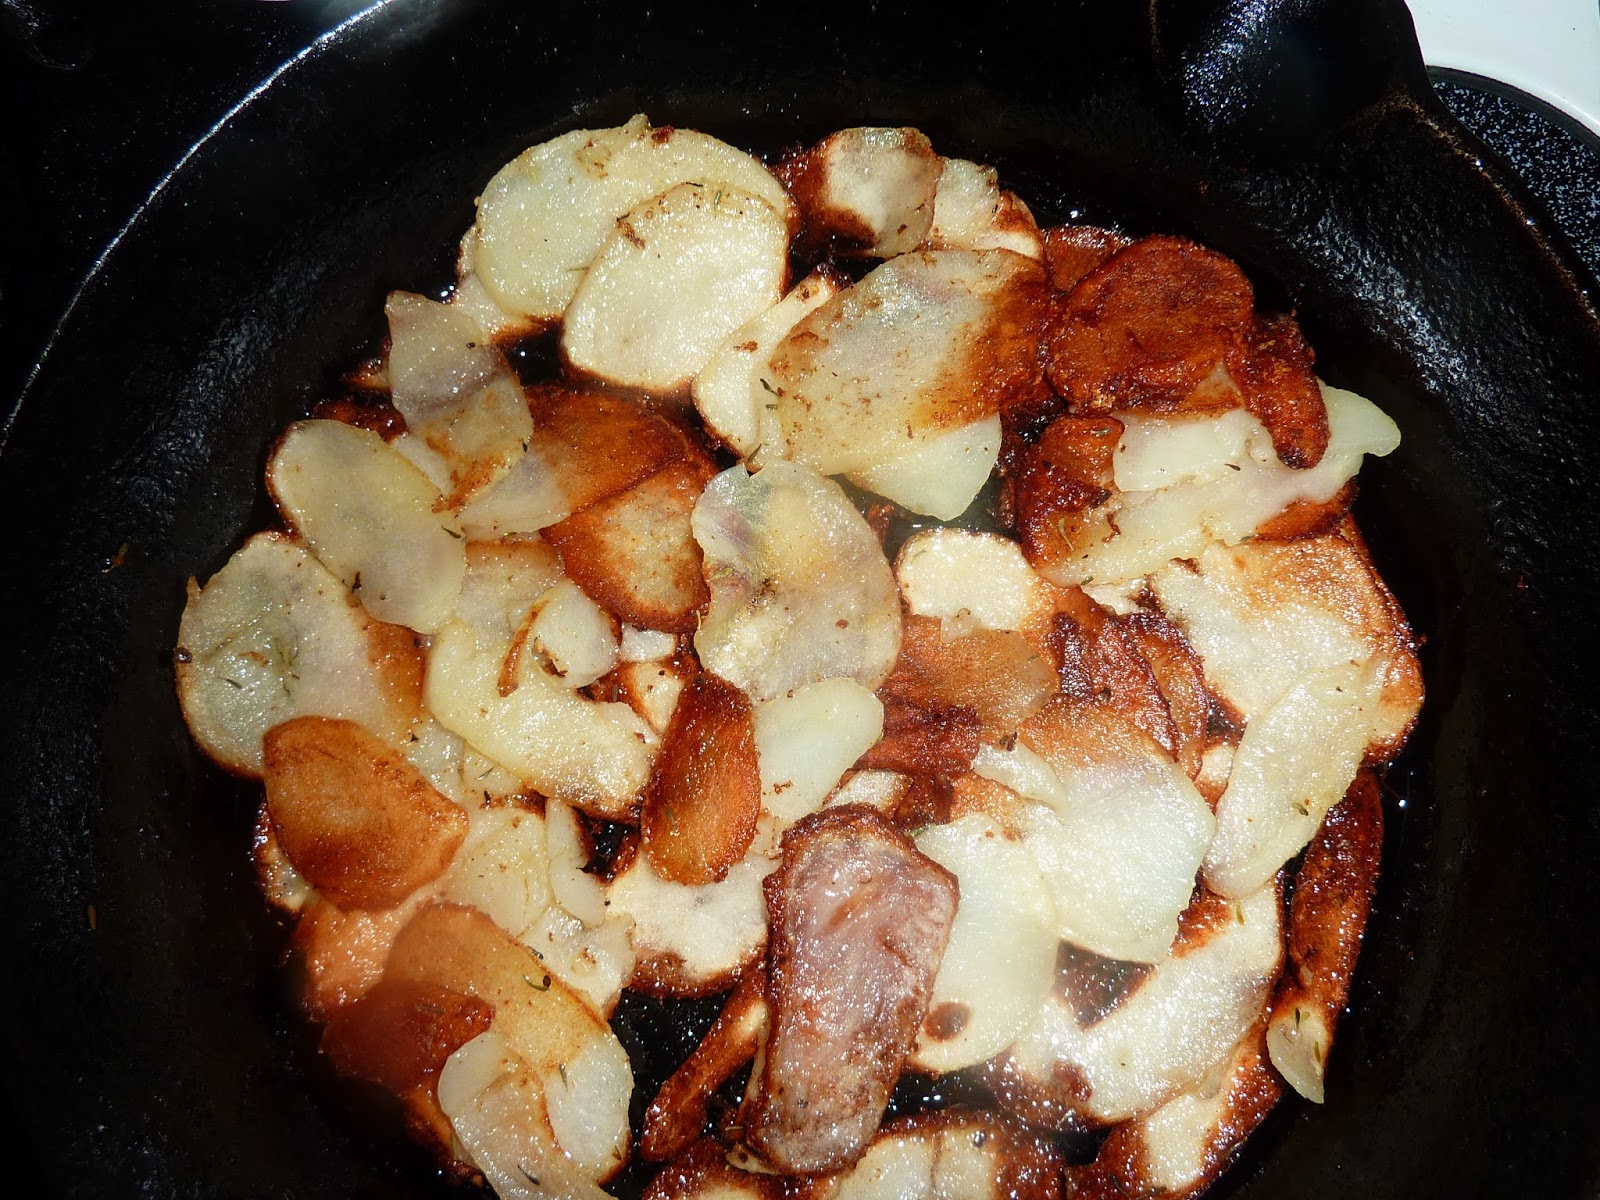
Add canola oil to a heavy or cast iron skillet.  Heat over medium-high heat.  Add the sliced potatoes.  Sprinkle the seasoned salt and ground pepper over the top side.  Flip once potatoes are browned to your liking.


TIP:  We like some crunchy parts when we make fried potatoes, so I flip some of the potatoes sooner so that they don't all turn out charred.  Probably not a chef's technique -  most flip them all at the same time - but we like it that way.  You can adjust the cooking  time for the way you like your potatoes. 

Once the potatoes are flipped, cook for about another two minutes. Add in the butter, the banana peppers, onion and tomato.   Add in the dried thyme.  Continue to cook just until the butter is melted and the vegetables are still crisp and firm to the bite. 


Serve with green or red pepper sauce. 

It's that easy. 

See you soon!


Monday, June 3, 2013

Warm Grilled Vegetable Salad with Goat Cheese


EAT YOUR VEGGIES!
Featured with grilled Scallops and Shrimp Skewer
topped with
Lemon and Almond Butter

Before I begin today’s healthy food post, I want you to know that we have a winner in the give-away;  a one-year free subscription to Cooking Contest Central.*  The winner is Betsy Bridge.    I know she will put the subscription to good use as her two daughters are now starting to enter cooking contests.  Congratualtions, Betsy!
 
Next time I try the shark steaks, I will try her suggestion to pan sear and then lightly braise them in beer or non-alcoholic beer.   She told me this was actually her husband's idea.  Since there were limited rules here ---  Great suggestion and thanks for playing!

It was a good learning opportunity for me as well.  Less vibrato, MK – just get to the point!  If I ever do a give-away again, I'll be sure to make the challenge something that takes less time.   While I got a lot of new followers, I didn't get a lot of people playing the challenge. But I am happy to have all the new followers so welcome.  

I hope you will enjoy my recipes, and I hope you will visit CCC if you want to enter food contests.  You will meet some of the nicest people you will ever know, and you might win money and great prizes, too!

**********

Anyway, in taking that "get on with it" cue, here is a quick post and a VERY easy dish which you can prepare in a SNAP.  It’s perfect for a hot summer night along with any type of grilled fish or chicken, even steak!  And you can mix this one up!

It’s a big serving of veggies, but then you really don’t need a starch.  And that will make you look better in your bathing suit.

Ingredients:

Serves 2: 

1 large or two small zucchini, sliced
2 yellow summer squash, sliced
1 plum tomato, halved
Other Suggestions:  Halved small green tomatoes; tomatillos; asparagus (quartered)

For the Dressing:

2 tbs. freshly squeezed lemon Juice
1 tbs. orange juice (fresh or from concentrate)
2 tbs. canola and olive oil blend, plus more for brushing grill
1 tsp. lemon pepper seasoning
Fresh chopped herbs:  whatever you like (suggest basil, lemon or lime basil, or mint)
1 ounce goat cheese, crumbled

Note:  You can also add a little a little Greek Seasoning if you like is a bit more savory/salty, or you can substitute balsamic vinegar for the OJ if you’d like a tangier dish.  Also --  cutting the slices evenly will ensure more even cooking.

Directions:

Add all veggies into a large bowl.  Whisk together dressing.  Pour dressing over and marinate vegetables for at least a half an hour at room temperature – a little longer if you have the time.

Preheat your grill or indoor grill pan to medium high heat. 


Once grill is heated, add the vegetables to the grill. Reserve the marinade.  Some will cook quicker than the others.  Flip with tongs as needed until you get nice grill marks on both sides and the vegetables are cooked to your liking. 

Note:  Red tomatoes only need to be grilled on one side, so I normally grill those last.

Once the vegetables are grilled, add them back to the bowl with the dressing and toss well.  Add the goat cheese was the vegetables are warm and stir to combine the flavors.  You can keep the salad warm under tin foil if you are going to be grilling your main coarse, or you can serve it add room temperature.


Add fresh chopped herbs right before serving.

Enjoy!

I’ll be back with more light summer meal and side dish ideas.  See you soon!

*Blogger received no compensation from CCC other than the prize to give-away.

Tuesday, April 30, 2013

Pub Steak Gorgonzola with Brussels Sprout Colcannon

In case you thought I fell off the face of the earth --

I apologize for being a blogger missing in action lately.  I had business to attend to, places to go,  and friends to see.  Now that things are back to normal -  are they ever really?  -  I'll be getting back into my posting routine.  I've got a few special features planned in the near future, so look forward to those!

I know, I promised you a special feature when I restarted this blog.  The wine event I had planned to cover turned into a rainy night.  While I had the constitution to taste, I didn't have the spirit to stand out in the rain to photograph.  Such is the life of an ambitious food blogger.

Excuses, excuses!

So today, as I am just getting back into the swing of things.  I'm going to bring you a recipe that I typed up several months ago.  I was going to submit this to a televised cooking contest but the website wasn't cooperating.  I never did submit it.  I'm sharing it with you instead.

I only have one picture to give you this evening.  The contest required a close up of the food and a picture of me standing behind the food (and you really don't want to see that one).  I guess they just wanted to see that I wasn't a werewolf or something before they "cast" me.  Since I never applied for the show, now the producers will never know that not only am I NOT a werewolf, but I don't even play one on TV. 

Okay, enough chatter.  Let's eat!


Serves 2.
1 ¼ lb. New York Strip Steak (2 steaks), cut about 1 ¼ inch thick
¼ cup Irish Whiskey or Scotch
1 tbs. extra tenderizing Worcestershire sauce
2 cloves garlic, smashed and peeled
1 large baking potato, peeled and cut into eight pieces
10 large Brussels sprouts, outer leaves removed and quartered
2 tbs. olive oil, divided
2/3 cup diced onion
¼ tsp. freshly grated nutmeg, divided
2 tbs. coarse sea salt, divided
½ tsp. white pepper, divided
¼ cup plus two tbs. Hellman’s® Olive Oil Mayonnaise, divided
¼ cup 2% milk, divided
½ tbs. freshly ground cracked pepper
1 cup fresh sliced white mushrooms
½ tsp. dried thyme
2 ½ tbs. Gorgonzola cheese crumbles
Fresh parsley for garnish (optional)
Other:  Cooking spray

Directions:

Place steaks into a plastic storage bag.  Combine the whiskey, Worcestershire and garlic in a bowl.  Whisk.  Pour into storage bag with steaks.  Marinate for at least 30 minutes; longer if you have the time.

Add potato and Brussels sprouts to a pot of water.  Bring to boil and reduce to simmer, about 20 minutes until the vegetables are softened. 

While the potatoes are cooking, add one tablespoon of the olive oil to a skillet.  Add onions and cook until softened, about three minutes.  Remove from pan.

When the potatoes and the Brussels sprouts are cooked, drain and mash.  Add onion, half of the nutmeg, ¼ of the salt and all of the white pepper.  Add in 3 tablespoons of the Hellman’s® (or Best Food's) olive oil mayonnaise and ½ of the 2% milk.  Mash and keep warm until ready to serve. 

Preheat oven to 350 degrees F.

Add cooking spray to cast iron or heavy skillet (oven safe).  Season steaks with remaining salt and the black cracked pepper, pressing the seasoning into the steaks.  Add to hot pan. Cook on one side for about four minutes. TURN OVEN OFF.  Add hot pan with steaks to oven and set timer for five minutes for medium rare.  Let steaks rest for five minutes before slicing. 

While steaks are resting, add the remaining tablespoon of olive oil to the same pan that you sautéed the onions.  Add mushrooms and thyme and cook for three minutes. 
Add the remaining mayonnaise, 2% milk, gorgonzola and nutmeg to a sauce pan.  Warn over low heat and whisk until ingredients are combined.
Top steaks and potato with the sauce and parsley (if using).    
Enjoy!  As always, I'll see you soon!
MK
Note:  Not an endorsement for the mayo and no product was supplied to blogger.  You can substitute any brand you wish, but opt for an olive oil based mayo for best results.  
Don't want to use booze in your recipe?  That's okay, simply leave it out.  
If you like this post, check out my other steak recipes! 

Tuesday, November 27, 2012

Fish Francaise with Roasted Broccoli and Beets and So Long, for Now...


Two years ago I started Just for Cooking as a way for me to create enough recipes to write a cookbook.  To date, I am proud to say I have 275 online plus a handful on Cafe Cheapo.  You can check those recipes out by clicking on the tab above.

It is with mixed feelings that I tell you that this is going to be my last post -- at least for now. I am not saying goodbye.  I have other endeavors which I would like to pursue (including writing that cookbook).  Anyone who has a blog knows that you spend too many late nights cleaning up issues and formatting and fixing photos.  At the same time, it can be very rewarding as I've met so many nice people.

You can still reference these recipes online.   I am no longer going to be accepting comments.  If I feel that there is something that I want to share with you, I'll be back... maybe sooner than later... who know?

Here we go!

When I think of Florida, I think of shellfish, grouper and Mahi Mahi.  The fish that lend themselves to Key West flavors.  In the fall, I think of cold water fish, such as cod or haddock.  I used haddock in this recipe, and I just know if you are a fish lover, you're going to love this as it's super easy!

I took a little help from the store here.  I just love these Gia Russa Simmer Sauces.  I did have a coupon but not because they asked me to promote it... full disclosure here on JFC! 
So, let's get down to business here tonight:

Serves 2:

Ingredients:

For the Beets and Broccoli -

1 large beet, peeled and sliced
2 cups broccoli florets
Sea Salt, to taste
Freshly ground pepper, to taste

For the Fish -

2 fresh haddock fillets - skin on (about 6-8 ounces each)
1 large egg, beaten
2/3 cup All Purpose flour
Freshly ground black pepper, to taste
2 tsp, seafood seasoning, divided
3 springs fresh tarragon, plus more for finishing
1 tsp. capers, drained and rinsed

Other:

2 tbs. Canola Oil
1 tbs. Butter
Gia Russa Simmer Sauce, Francaise flavor (one cup)

Directions:

Preheat oven to 450 degrees F.


Add the beet, broccoli, salt and pepper to a cookie sheet.  Drizzle with one tablespoon of the canola oil (see other ingredients).  Toss with hands.

Bake for about 30 minutes until the beets are tender.


Dredge the fish in the egg and flour seasoned with the black pepper and the seafood seasoning.  

Add one tablespoon of Canola oil to a pan.  Heat to high and cook the fish for approximately three minutes each side until lightly browned.  Add the butter along with the tarragon and the capers.   Carefully remove the fish to a plate and keep warm.  Add the Francaise sauce to the pan and warm through on low heat.


Serve sauce over fish.

I do appreciate all of you who read my blog over the last two years. I hope you will wish me the best as I wish you the best in your life's journey.

I hope you will look for my cookbook out there!   As I often say, I'll see you soon!

Sunday, November 11, 2012

Jalapeño Spanish Rice with Corn


We can all use easy side dishes.   I have been asked to post more of them on this blog.   This one takes a little help from the store.  All I did was add in a few things and it's delicious.  Sometimes we are so fried from work that don't think of the obvious.  That is why I am sharing this recipe with you. 

Ingredients:

1 box Rice-A -Roni Spanish Rice ® mix (6.8 oz)
2 tbs. butter
1 tbs. vegetable oil
1/2 medium Jalapeño pepper, seeded and diced
1 can tomato sauce (8 oz.)
2 cups cold water
1 can corn, drained (15 oz)

Directions:

In a large non-stick skillet, add the rice and vermicelli mix to the pan along with the butter and the oil.  Add in the Jalapeño pepper,  Heat until golden brown.

Stir in the tomato sauce, the water (slowly) and the corn.  Bring to boil and reduce to simmer.

Cover and simmer over a low heat for about 15 - 20 minutes.  Let rice rest about five minutes before serving.

Enjoy.

I have been very busy lately with other things but I promise I'll be stepping these blog posts up again very soon.  Thanks for reading!

Tuesday, June 26, 2012

Braised Green Beans with Shallot Butter and Thyme

If you are like me in the summer, you always buy too many fresh greens beans.  We have to find ways to use them up before they turn.   This week, I am going to bring you two great green bean recipes; one side and one main dish that I know you are going to love.


Tonight I prepared Braised Green Beans with Shallot Butter and Thyme.   This is a great side dish for grilled meat, fish, or meatloaf.   It's so simple to make.

Here is what you need and what you need to do:

Serves 4.

Ingredients:


1 pound fresh green beans, washed and snapped at the ends
2 tablespoons butter, divided
1 cup vegetable stock or broth
1 medium-large shallot, chopped (about 2 tablespoons)
2 springs of fresh thyme, removed from the stems

Directions:

Place washed green beans into a braising pan along with one tablespoon of the butter.  Pour one cup of boiling vegetable stock (I heat it in the microwave) over the top of the beans.  Bring to boil and reduce to simmer about five minutes until the beans are tender - longer if you want the beans to be well cooked. 

Drain and plate the beans and keep them warm. 

In the same pan, add the remaining tablespoon of butter and the shallot.  Sauté for two or three minutes.  Add the thyme and cook for one more minute.  Pour butter and shallot with thyme over cooked green beans and serve immediately. 

With my next post (including green beans), I am beginning a 13 part summer series in tribute to the 4th of July.  I will be writing regional recipes from the original 13 colonies in celebration.  

And don't forget to check out tonight's money-saving post on Cafe' Cheapo. 

I am still editing my first video to go up on Living El Cheapo.  I'll let you know what that is posted.

Enjoy tonight's green bean recipe.  I'll see you soon!

Monday, June 11, 2012

Amazing Artichoke Week: Stuffed & Grilled Artichoke

Note:  Before I begin tonight, if you have not yet, be sure to check out Cafe' Cheapo.  It's my new online cookbook featuring healthy and budget-friendly meals.  Each week for 52 weeks, I will post one brand new recipe (not seen here), and I will price out the ingredient list to help you figure out if it's a recipe that you can make at home.  See you there!

Visit http://cafecheapo.blogspot.com


This week, it's all about artichokes.  I will post recipes using both canned and frozen hearts.  Tonight it's all about fresh artichokes.

I am almost 50 and I've never eaten a fresh whole artichoke until today.  I do not know why.  I guess it's one of those foods that kind of intimidated me when I would see it at the market.  Oh, I love artichoke hearts.  I use those often but today was truly a culinary adventure.  But fresh I had never tried.

I found out after I purchased these two artichokes at the farmer's market yesterday that they probably were not the best of the best.  There was a little too much "brown" on the leaves, yet they trimmed up nicely and they tasted great. 

I decided to stuff them, but it was in the 90's here today and even with AC on, I didn't want to heat up the house with the oven.  I decided to make this dish in a tin foil roasting pan on a gas grill and it turned out great!  Since tonight was our "big salad" night - we often eat a big salad for dinner in the summer - an appetizer was just what the home cook ordered.

This recipe serves two if you are having a light dinner, our four if it's a starter for heavier meal.

Ingredients:

2 medium fresh artichokes
2 medium lemons
1/4 cup olive oil, divided, plus more to drizzle
2 cloves minced garlic
1/8 cup minced onion
Pinch or two of crushed red pepper (to taste)
1 cup plain bread crumbs (regular or whole wheat)
2 tablespoons Parmesan and Romano cheese, grated
1/4 tablespoon coriander seeds


Note:  To make this recipe, you will need a tin foil roasting pan and tin foil.  You will need two cups of cold water for the first steaming process, and an additional cup to continue the steam in the tin foil pan. 

Directions:

Wash artichokes in cold running water.   Trim away stems so that the artichokes will set upright in a pan.  Cut the top part off the the top quarter (at least 2/3 inch).  Trim the pointed edges of the leaves.


Steamed artichoke, before I peeled it back
and removed the fuzzy choke.

Place artichokes in a steamer basket with about 2 cups water in the bottom and 1/2 lemon.  Steam, covered, for 20 minutes.  Let cool.

Carefully peel back leaves.  Remove the center "fuzzy" part called the choke with a spoon. 

When you are ready to grill the artichokes -

Preheat grill to 400 degrees F.

In a saute' pan, add one tablespoon of olive oil.  Add the garlic, onion and crushed red pepper.  Cook for three minutes until onion is softened.

Add the bread crumbs and the cheese.  Add remaining olive oil and cook until the bread crumbs are coated.  Add the juice of 1/2 lemon into the pan. 

Stuff the center of each artichoke and add a little of the bread stuffing in between the leaves.  Place upright in tin foil roasting pan.  Add one cup of water to the bottom of the pan, 1/2 lemon, sliced, and the coriander seeds.  Cover tightly with tin foil.  Place on grill and lower the lid.  Watch so that the temperature doesn't go beyond 450 degrees F.  Lift the grill lid as needed to reduce heat.  Grill in pan for 30 minutes.

Serve with lemon wedges.

Enjoy!  I'll see soon with more artichoke recipes.