Monday, December 29, 2014

A Simple Way to Roast Prime Rib


PRIME RIB WITH MUSHROOM SAUCE

 
Happy holidays, everyone.  I trust you had a good one.   I've been so busy these past few weeks that I haven't had an opportunity to post anything for you.  Now, I did try, but my recipe either didn't turn out the way I hoped (and I won't EVER share those with you) - or I just dropped the ball.   Holidays  can be hectic. 

Before I get to the recipe, please tell me what you think of the new design of my blog?   It's cleaner and more professional looking, I think.   Feel free to send me feedback.

Okay,so Prime Rib is a holiday staple.Whether it be for Christmas Day or an elegant New Year's Eve celebration.

But roasting the perfect prime rib can be chore.   My "traditional" recipe requires turning the oven off midway and not opening the oven door. But how impractical  is that if  you  don't have a  double oven.  Still,  I'll share that previous post with you here:

http://mksfabfood.blogspot.com/2011/12/perfect-standing-rib-roast.html

Now my own recipe reinvented. You only need three ingredients.  And I took a little help from the store.  

I've gotten flack in the past, as  has hubby from cooking contesters like us for using steak  seasoning. Truth is, it's delicious on here.  And  if  you can go to the warehouse store and purchase a big  container of it, why buy all  these little bottles  of  this and that which  you may or may not use again?   Really?

You can certainly substitute  your  own  steak rub. But  I encourage you to try this recipe and  tell me if it's not delicious without all the fuss. That is  why I call this post, "A Simple Way to Roast Prime  Rib."  

As a side note, I made a simple porcini sauce for my prime rib by using these ingredients:


I simply added the dried mushrooms to the wine and put them  into the microwave for 30 seconds. Then  I  reduced the Marsala wine with the mushrooms and beef stock down to half.   I added in the garlic braise as well as the concentrated broth.    Butter is added a little at time thicken.  Salt and pepper are added last and to taste. 

So here we go with the prime rib.

INGREDIENTS:

1 prime rib roast, bone in (about 4 1/2 lbs)
1 tablespoon grill seasoning for steak
1/2 tablespoon dried Herbes de Provence


DIRECTIONS:

Preheat oven to 475.  Place roast in pan on rack.  If roasting potatoes, I suggest you place those right on the rack next to the roast.

Place in oven and  roast for 30 minutes.  

Reduce heat to 375 degrees.  Do not open oven door. 

Continue to roast for 85 minutes until internal temperature is 140.   Cover lightly with tin foil to tent.  Carryover cooking  with fifteen minutes under the foil should bring the roast to medium rare:   145 degrees.


Yeah,  it's that easy!

I'll see you next year.  And, yes,  I know that's a lot of sour cream on the potato,  but it's a holiday.;.)


Wednesday, October 15, 2014

Lemon, Rosemary and Elephant Garlic Chicken


Wow!  I haven't posted out here since August.  Yet I still see from my stats that many of you are enjoying my previously posted recipes.  I thank you for that. 

I didn't mean to ignore you.  It's just been a crazy summer.  Now that it's fall, things move a little slower and I'm also ready to cook some comfort food.

Baked chicken on the bone just feels like comfort food to me.  It's still warm down here in Florida and I'm not quite ready for "heavy food."  So here's my take on Baked chicken with lemon, rosemary and garlic.

If you recall from my previous posts, Hubby Dan loves the "flavor" of rosemary but not the pine needle texture.  Hence  I am using the rosemary to create a "rack" for my chicken legs and thighs. 

This dish is incredible, and it's fairly easy to prepare.  And don't knock the store bought seasoning.  Everyone needs to take a little help from the store now and again and the combination of the steak seasoning with the lemon pepper make a delicious combination.  

I like to use a combination of chicken legs and thighs.  I consider one portion two pieces for this, so you will have leftovers if serving two.  I like to save two of the legs to make a little chicken salad the next day.  Of course, you can double or triple as you wish.

So here we go-

Ingredients:

Olive oil cooking spray
4 sprigs fresh rosemary
chicken legs, skin on
2 bone-in chicken thighs, skin on
zest of one small lemon (yellow part only)
4 sprigs fresh thyme
1 teaspoon grill seasoning for steak
1/2 teaspoon lemon pepper seasoning
1/2 clove elephant garlic, sliced very thin
2 tablespoons fresh lemon juice
1/2 cup dry white wine or low sodium chicken broth
1 1/2  tablespoons cold butter, divided
Optional:  Fresh-frozen crushed mint

Directions:

Preheat oven to 350 degrees F.

Add rosemary sprigs to pan.  Top with chicken, skin side up.

Sprinkle the chicken with the lemon zest, thyme, grill seasoning and lemon pepper seasoning. 

Top chicken with elephant garlic slices.  


Bake uncovered for 1  hour and 15 minutes, until juices run clear.  Adjust cooking time for your oven.

Remove chicken from pan.  Lightly tent and let it rest at least five minutes.

Place pan on burner on stove over medium heat.  Remove the rosemary sprigs and crispy elephant garlic slices and discard.  Note that not all of it will come out of the bottom of the pan. 

Add the lemon juice and the wine or broth;  scrape the browned bits from the bottom of the pan.  

Add cold butter in two batches.   Bring to a light boil and reduce to simmer until the sauce thickens slightly. 

Serve over cooked Jasmine rice with your favorite green veggie (like sautéed green beans with a touch of mild dried pepper and Tamari).

I grow mint in the summer and often freeze it.  I like to crush a little fresh frozen mint into the sauce at the end to give it that extra ummmm. 


Wine Pairing:  Un-oaked chardonnay


Enjoy and  I will see you soon!

Thursday, August 21, 2014

Chicken Farro "Risotto" with Saffron


Chicken Farro Risotto with Saffron


I love rice.  I love all types of rice including wild and brown rice. 

I love barley.  But I just can't seem to get into couscous and quinoa.  Perhaps it is a texture thing. 

But I do like a good Tabbouleh salad.  I used to order that at my local food court.

I REALLY love good Risotto.  I love everything about it; the creaminess; the starchiness, but most all, I love how the savory dish sounds:

"RI-SOT-TO!"

No hands down, the BEST chicken Risotto I ever ate was a weekday special at Canaletto in Las Vegas many years ago.  I'm thinking it was about 2003 or 2004.  Mama Pirri (my mother-in-law) ordered it and I ate most of it.  

My recipe has all of the creaminess but it's made healthier with farro. 

Farro is one of the oldest grains cultivated by human beings.  It's high in vitamins A, B, C and E.   It is earthy and to me, it reminds me of a cross between barley and Arborio rice; both of which I have used to make risotto in the past. 

Contrary to popular belief, farro and barley are not the same thing.  Although they are often substituted for each other in recipes.  I also find that farro isn't quite as starchy as rice. 

Now, if you are already a farro "expert" you might be thinking, "Mary Kay, you are going to have to soak the farro all night before preparing this recipe." 

Well, actually, no you don't.  Here is a way to get the texture that you want for your farro "risotto" without having to go to all that fuss. 

Now, it does take a little longer than traditional risotto to prepare, but as trade off, it doesn't require as much attention as you would need to give it if you used Arborio rice.  We all like trade-offs, now don't we?

Well, enough chit chat.  Here we go with the recipe:

Note:   The rule for farro is three-to-one:  three cups of water for every one cup of farro 

Oh, and PS -  you will also notice this recipe uses one of my new favorite ingredients, Mediterranean spiced sea salt.  It is available in the spice section of your grocery store. 

Ingredients:

1 cup Italian Pearled Farro
3 cups hot water
2 tablespoons extra virgin olive oil, divided*
2 tablespoons butter (one tablespoon cold), divided
1 tablespoon shallot, chopped
1 teaspoon fresh thyme, stripped from stem and lightly chopped
1/3 cup dry white wine or non-alcoholic wine
6 cups chicken broth or stock, warmed through (lower sodium)
1 pound chicken tenders, cut into bite sized pieces
2 teaspoons Mediterranean spiced sea salt
Pinch saffron threads
1/4 cup 2/% milk, warmed through  
1/4 cup grated Parmesan and Romano cheese blend
fresh parsley for garnish (optional but recommended)

Directions:

Soak the farro in hot water for 30 minutes before preparing this recipe.  Drain off excess water before using.

Heat a large skillet or pan over medium heat. 

Add the butter and half of the oil.

Once the butter melts, add the shallot and the thyme.  Cook for about two minutes until the shallot begins to soften, but adjust heat accordingly so the shallot does not brown.

Add the strained farro.

Using a wooden spoon, spread the farro out evenly and let it toast up for a minute or two.  At this point, the shallot might begin to brown ever so slightly, but make sure that it doesn't go too far.  Once lightly toasted, add the white while.  Stir and let the wine evaporate and soak into the farro.


Ladle about 1/2 cup of your chicken stock or broth into the farro and stir about there or four times, reducing heat to low-medium.  Stir vigorously for about a half minute.    Repeat as necessary until most of your broth or stock (or all of it) is used, until the farro is tender with a little bite to the tooth (al dente).  This process should take about 38 minutes.


While the farro is cooking, add remaining oil to a sauté pan.  Heat until just under very hot. 

Add the chicken.  Do not season at this point, as you want the chicken to brown and the salt might prevent that from happening.  Resist the temptation to turn the chicken too quickly as it might tear.  The chicken will tell you when it's ready to turn (really).  It turn easily in the pan.  If needed, use a little of the hot chicken stock to deglaze your pan.

Once you turn the chicken in the pan, add the sea salt seasoning.  Finish cooking.  Stir and remove from pan to a bowl so it does not over-cook.

Add the remaining (cold) butter, the saffron threads and the warmed milk (suggest warming a few seconds in the microwave) to the risotto. 

Now, this is where MK's recipe departs from the norm: 

Normally your risotto would be done now, but to finish farro risotto, I use what I call the "Iron Dome" method. I use a lid that is too short for the lip of the pan, yet sits above the food, and rests on the side of your pan. 

Keep in mind, steam rises.  So you do not want to evaporate the steam too much.  You are concentrating the steam and the flavors with this method, if that makes sense.   It will finish cooking your farro with the warm milk.  Keep the dome in place over low heat for about five minutes.

Total cooking time - about 43 minutes.

Stir in the chicken and the parmesan cheese into the pan.
Plate and top with fresh chopped parsley.  

Serve immediately. 

Enjoy.

*Have a little extra oil on hand.  Often you will need a little extra for your farro or the chicken, depending on the heat of your burners.  

Cook's Notes:  I used my own homemade stock for this recipe.  If using store bought, I recommend you use an organic brand which is lower in sodium. 

If you want to use all stock and no wine,  you can, but adjust the amount of sea salt you use.

Salt and pepper can be added at the table if necessary. 

See you soon!

Tuesday, August 5, 2014

Tomato Braised Lamb Shoulder Blade Chops


I like to serve this lamb dish over cooked lentils and topped with sautéed greens and mushrooms.   Yum!


Okay, I know that I promised you "Italian" the next time I posted.  But this is more of a Mediterranean influenced recipe. 

Before I begin, I'd like to thank any of you who have thrown your support my way in the "Extended Stay" contest.   If you haven't seen that post, I added a link to my last post to the end of tonight's.  Thanks again for voting for me.  

If you wonder where I've been, there are lots of great cooking contests out there right now and I have been working on those.  As I have a day job, my time is limited.  But fall always brings more chances for me to blog, so I'll be stepping up the posting soon.

Also, I am thinking of updating the look of this blog again.  So parts of my blog may be under construction here and there, but it's only to make my blog better for you! 

Okay, enough chit chat.  How about a recipe?  I mean, that's what you really stopped by to see, right?

I love lamb chops.  When I think of them, I think of these petite chops or the "lollipops" which are often served as appetizers.  Those can be expensive.  I honestly go into shock every time I go to the checkout now.

Lamb shoulder blade chops are often a GREAT value.  They are often packaged as "steaks."  But every time I've bought them, I've tried to marinate and grill them or pan sear them, and they've curled up and turned into... well, not my best meal.  Frankly this time of year, as much as I LOVE to grill, major thunderstorms roll in. I don't mind grilling on the patio in the rain, but I think getting struck by lightning might hurt so I don't want to do that. 

Tonight when I discovered a secret:  BRAISING them.  Yes.  Unlike what the butcher's label often tells you to do, these chops are most delicious braised.  

You still marinate them; oh, yes you do, but then you quickly pan sear them to hold in the juices, and then slow braise them in a flavorful tomato sauce laced with white wine and Worcestershire -  and it makes them so nice and tender. 

If you like lamb, you're going to love this recipe!

So here we go:

This recipe serves two (2) with lots of sauce.  See my note at the end for doubling the recipe.  Unlike many of my recipes, this one will need just a little tweaking if doubling. 

Directions:

2 Lamb Shoulder Blade chops, bone in, about 1 1/2 lbs. total
1/8 cup olive oil
3 cloves garlic, minced and divided
Pinch Cayenne Pepper
1/8 tsp. salt free table blend seasoning (select a brand with includes cumin if possible, or add a pinch of cumin)
1 small lemon, juiced and rind reserved
2 springs rosemary, plus 1/2 tbsp. chopped rosemary
1/8 tsp. Mediterranean sea salt
1 can (15 ounces) original recipe stewed tomatoes with juice
1 tbsp. concentrated beef stock
1/4 tsp. Worcestershire sauce
1/8 cup dry white wine or non alcoholic wine


Note:  You can substitute beef stock for the concentrated stock and wine to keep it "family friendly."  Adjust salt accordingly depending on the salt content of your stock.

Add the lamb to a bowl or container suitable for marinating.

Add the olive oil, 2 cloves of minced garlic, Cayenne pepper, and salt free table blend to a bowl. Whisk in the lemon juice. 

Pour the mixture over the lamb and add the rosemary springs and lemon rind on top of the chops (steaks).  Marinate for at least an hour, but no more than 90 minutes.  Acid tends to cook meat and you don't want that. 

Get a sauté pan smoking hot. 

Pull off any large garlic chunks of marinated lamb but do not pat dry.  You need the oil to get the sear.

Add the rest of the oil to it and sear the chops on both sides; about one minute each just to get a nice sear - longer if you need to, but no more than two minutes each side.

Transfer to a glass baking dish.  Season with the sea salt. Flip lamb and season the other side.

Mix together the tomato, concentrated beef stock, Worcestershire sauce, wine the remaining garlic and reserved chopped rosemary. 

Pour the braising mixture over the lamb.

Carefully cover with foil so that the foil isn't touching the tomatoes. 

Bake at 275 for one hour until lamb is well one and falling off the bone. 

You are going to LOVE this recipe.

Cheers!  I'll see you soon.

Note:  If making four (4) servings, use half of the juice from the second can of tomatoes, and 1 1/2 tbs. of the concentrated both.

To serve:  I like to serve this over cooked lentils with sautéed collard greens and mushrooms. 

Link to previous blog post:  SEND MK TO NYC!

MK


Monday, July 28, 2014

SEND MK TO NYC!


Hello Foodies!

Hey, hubby can't win ALL of the cool cooking contest trips!

This is just a quick blog post;  I found out that I made the top 50 in the Extended Stay Away from Home Cooking Contest.  

Link:  http://contest.awayfromhomecooking.com/index.html 

The objective of the contest was to create a quick and EASY meal that anyone (even someone who doesn't cook) could create in a hotel room which includes a kitchen - but you could use a stove top and microwave ONLY - no ovens. 

I opted for comfort food.  Having been a road warrior back in the late 90's, I KNOW what it's like to be away from home for long periods of time.  Some nights you just want comfort food and a glass of wine from the bar.  I also think about the families who are relocating.  You need to prepare some meals in, and you want something that will appeal to and also entertain the kids.

Enter my TURKEY TACOLADAS.  It's a fusion between a taco and an enchilada, and I managed to get that slow baked flavor in a dish that's finished in the microwave.  The secret was keeping the recipe simple enough that the ingredients didn't firm up in the microwave, and finding just the right amount of cooking time.

I know this recipe is a little more simplistic than I normally post, but I hope you will give it your consideration.  I have permission from the contest folks to post this link here.  The judges are picking two finalists and the fans are picking two.  I'd LOVE it if you go online and give me your support.  You can vote once a day until 8/22!

YOU CAN VOTE FOR MY RECIPE HERE!  

http://contest.awayfromhomecooking.com/view-recipe/rid-1651/Turkey-Tacoladas/page-4.html

If I get a spot in the cook-off, I get to meet Food Network's Sunny Anderson AND I get a chance at a nice prize - plus I'll get to appear with her at a future event! 

How cool would THAT BE?   You know that hubby, Dan, is kicking my be-hind (that's southern for buttocks) with the big, cool prizes.  I would love to get a chance at this opportunity!

How cool is that that Extended Stay has these types of kitchens?  Where were they when I was a traveling fool?  

Thank you in advance for your support!

As it is big contest time, I've been devoting my test kitchen to those recipes but I will be back very soon with a new recipe that I know you are going to love.

Think Italian...  hint, hint...

As always, see you soon!  

MK

Thursday, July 3, 2014

Re-post: Easy Pub BBQ Sauce

Easy Pub BBQ Sauce on a Grilled Pork Chop
Great on Chicken, too!

Is "re-post" a word?  Probably not, but you know what I mean.  This is a recipe I've posted before.

I've been busy, busy, busy; so I'll make this post short and sweet - or should say savory?
 
Just in time for the 4th of July, a re-post of one of my reader-favorite BBQ sauce recipes.  This one is so easy, you'll never buy store-bought sauce again.  All you need are items from your pantry. 
 
Mix it up and use apple cider (hard or non-alcoholic) instead of the Irish ale.
 
I hope you have a great (and safe) 4th of July weekend. 
 
Ingredients: 

Makes 6 servings

1/4 cup ketchup
2 tbs. yellow mustard
2 tbs. Heinz 57 ® Steak Sauce
1/4 cup honey
1 cup Irish Red Ale
1/2 tbs. onion powder
1 tbs. Worcestershire Sauce
1 tbs. apple cider vinegar

Directions:

Combine all ingredients into a sauce pan.  Bring to boil and reduce to simmer, about two hours over low heat, uncovered, until sauce is thickened to your liking.  Whisk occasionally.


Wednesday, June 11, 2014

Jalapeño Marinara Sauce


It's a rainy night in Florida.  Okay... maybe I have the state wrong, but we've had our share of summer storms lately. 

Now, I am lucky in that I get to work from home most days for my day job.  On days like this around 3 pm when I'm starting to think about what to make for dinner, I realize that outdoor grilling is probably out of the option - that is if I don't want to become a lightning rod and/or get some mosquito-borne disease that I cannot pronounce. 

By the way, remind me to pick up the pepper plant on my patio that got knocked over from the torrential downpour a few hours ago. 

I'll tell you what you make - you make a nice pot of marinara sauce which can simmer away and get all delicious while you continue to get your work done.  I did just that.  But this isn't any marinara sauce.  My sauce has a nice hint of Jalapeño pepper.  It's great over pasta, or you can make up a nice Tex-Mex style Chicken Parm.  And it freezes great, too.

Tonight I'm making a special lasagna roll up.  I am debating if I will give you that recipe or if I'm saving it for a contest. If you're really nice, I might post it here.  ;.)  You all are ALWAYS nice...

With no further adieu -  I give you Jalapeño Marinara Sauce!

Ingredients:

1 tbs. good quality olive oil or extra virgin olive oil
1/2 medium Vidalia or sweet onion, chopped
1 medium Jalapeño pepper, seeded and chopped
3 cloves fresh garlic, minced
1 tsp. salt free Italian seasoning (I used Mrs. Dash)
1 tbs. salt free tomato, basil and garlic seasoning (Mrs. Dash again)
1 tbs. coarse sea salt 
1 can (14-15 ounces) diced tomatoes with basil, garlic and oregano (with juice from can)
1 can (28 ounces) organic fire roasted crushed tomatoes
1 packet reduced sodium concentrated chicken broth
4 or 5 large fresh basil leaves
1/2 cup dry white wine or non alcoholic wine*
2 tbs. sweet red wine or sweet red vermouth (optional but recommended)
2 tbs. organic tomato paste
1 1/2 tbs. grated Parmesan cheese

Directions:

Add olive oil, onion, Jalapeño pepper, and garlic to a medium (but deep) sauté pan.  Add in the salt free seasoning(s) and the salt.   Cook over medium heat for about three minutes until the onions and pepper soften (but do not brown).

Add the diced tomatoes, crushed tomatoes and the concentrated chicken broth.  Bring to boil and reduce to simmer, covered, for at least thirty minutes. 

Remove the pan from heat and let cool slightly.

Add the mixture to a food processor along with the basil leaves.  Carefully pulse the mixture until very lightly chunky but more on the smooth side.  You should still have a good bit of texture to the sauce.

Transfer to a sauce pan.  Bring back to a light boil; add in the wine(s), the tomato paste and the Parmesan cheese.  Stir and cover.  Reduce heat to low and cook for about an hour, longer if you have the time

*You can substitute low sodium chicken broth for the wine, but eliminate the concentrated chicken broth if you do.  The touch of sweet red wine adds a hint of sweetness to the sauce without adding any sugar.

Let cool before freezing.

Helpful tip:  Sauce not thickening fast enough for you?  Up the heat slightly and crack the lid to let steam and moisture escape.  This will help to reduce and thicken the sauce. 

Enjoy this recipe, and I'll see you soon!


Tuesday, June 3, 2014

Chipotle Teriyaki London Boil


Can you believe this London Broil is medium rare, and it's been cooked twice?
Check out my grilling technique!
                                     
These are the kinds of recipes that I love to bring to you -  here you are getting not one, but two meal ideas using the same cut of meat, as well as a simple side dish.

Grilling is one of my favorite things to do in the summer.  A couple of years ago, we had a gift certificate for a hardware store and we decided to go get ourselves one of those double grills; one side is gas, the other is charcoal.  I've been having all kinds of fun with it.

Living in Florida, we can grill all year round.  In the summer, I don't like heating up the house with the oven if I can help it.  So I fire up the grill.  Today I'm am bringing you a great (easy) recipe for London Broil. 

Let's talk about London broil:

London broil isn't a cut of meat; it's a style of cooking.  Most often it's thick cut flank steak or tri-tip, but you might just find it's any cut of meat that is less tender.  Check with your butcher to see what cut they market as "London Broil" in your store.  You might be surprised that it is actually sirloin or round.
 
What I love about this recipe is that you can actually get two meals out of it.  You can marinate it and grill it up one day, leaving the center kind of rare.  In fact, what I am showing you here is the re-do (day two) - yes, leftovers.  I wanted you to see how nicely the meal grilled up the second day (even if you like it medium rare like we do).

I first grilled this up on Saturday night.  On Monday, I used it to make this fabulous dinner.  Talk about a time saver on a busy weeknight!
 
I'm showing off my London broil recipe over leftover smashed potato salad mixed with fresh spinach and Dijon mustard (I also added a little spring onion to the leftover potato salad) and I served it with grilled Vidalia onion packs - yum, yum and more yum! 

Got to love this time of year when the Vidalia onions are for sale. 
 
This recipe is also great on top of a fresh Caesar salad.  In a future post, I'll share a great Caesar dressing with you. 

But the bottom line is, this is an excellent meal to prepare with any type of summer veggies. 
 
So fire up the grill!  Here we go:
 
Ingredients:
 
2 – 2 1/4 lb. London broil (thick cut flank steak or tri tip)

For the Marinade: 
1 tsp. Teriyaki sauce
1/8 tsp. grated ginger
1/2 tsp. salt free Chipotle seasoning
2 cloves garlic, minced
Dash of rice vinegar
1 tbs. canola oil, plus extra for bushing  

Other:
Grill seasoning for steak
Cooking spray for the grill
Freshly squeezed lime juice for seasoning after grilling (optional)

Directions:

Add the meat to a container.  Combine the Teriyaki sauce, ginger, Chipotle seasoning, garlic, rice vinegar and canola oil.  Marinate under refrigeration for at least 2 -3 hours; longer if you have the time.

When you are ready to grill, bring the meat to room temperature for about 20 minutes.  Pat the excess marinade off with a paper towel.

Bush the meat with extra canola oil or vegetable oil can be substituted.  Rub London Broil with the steak seasoning.  

Note:  Even though there is some salt in the Teriyaki seasoning, I like to add the steak seasoning (which adding salt right to the meat) right before I cook it.  Remember that salt draws the moisture out of the meat - and you don't want your meat to be dry. 

Preheat gas or charcoal grill treated with cooking spray to 400 degrees. 

Rub both sides of the London broil with the steak seasoning.

Grill on one side for about 5 without moving until the sear on the one side.  Turn and continue to grill for about six minutes over direct heat. 

Move the London broil to indirect heat and continue to cook for about 15 minutes each side until internal temperature comes to 145 degrees for medium rare.  The center should still be more on the rare side.    Adjust cooking time accordingly for your grill.

Let meat rest for about 20 minutes before slicing. 

Season with lime juice before serving. 

To reheat leftover London Broil, bring to room temperature for about 30 minutes.  Rub a little extra canola oil over both sides of the meat (you can also add additional steak seasoning or Chipotle seasoning, or a combination of both is you like).

Grill for about four minutes first side, and three on the second until warmed for medium rare (pictured).  Adjust cooking time for your liking.   Note that in this case, you will still have a bit of a cold center.  If you like your meat warmed through, then do your thing and prepare it how you like to eat it. 

There are no definite rules with grilling.  Just like with wine; it's what YOU like that counts!


Okay, so what about the onion?   That is simple - 

I like to quarter small Vidalia onions, leaving the bottom intact so that they form a flower.  Don't cut them all the way through. I spray tin foil with cooking spray.   In the middle I add for each onion -

1/2 tbs. butter
A few shakes of Worcestershire sauce
1/2 packet of concentrated beef broth

Form a foil packets (if not using heavy duty foil, you might need to double wrap like I did here).  I like to grill for 1/2 hour to 45 minutes over medium heat.  I also close the lid to create steam.  You are going to love these!  Try them.

Enjoy, and I'll see you again soon!


Friday, May 23, 2014

Summer Seashell Pasta with Pork and Peas

Summer Seashell Pasta with Pork and Peas


I know that I haven't posted for a while.  We got back from Chile and then were out of town again; and then I had browser issues which kept me from updating.  But it appears all is well now.

I often get asked for quick and easy recipes for the summer months.  And what's quicker and easier than a one dish pasta meal?  This dish has a lot of flavor on it's own, so cheese for passing at the table is optional.  

I used thin cut pork chops instead of ham to make the dish a little healthier.  The trick to keeping them tender is to cook them on the one side on top of the stove, turn on the hot pan, and then just let them finish in a 250 degree oven using the method described below. Slicing them right away after just a short resting time will stop the cooking process and keep them juicy.

BTW -  I am no longer counting points; but you can find a variety of recipes from earlier in the year under the points section.  I actually am down a size now - so I've decided to not follow any particular "diet" but to try to learn to eat healthier on my own and so far, so good!   

Here we go:

Serves 2.

Ingredients:


1/2 lb. thin pork chops (4 chops)
2 tbs. Italian dressing (your favorite brand)
1 tsp. grill seasoning for chicken
2 tbs. lemon juice, divided
1/2 lb. medium seashell pasta, cooked per package directions and drained and cooking water reserved
1/2 cup frozen sweet peas
4 ounces Mascarpone cheese 
1 tsp. garlic powder
1/2 tsp. salt free Italian seasoning (I used Mrs. Dash)
1 tsp. low sodium soy sauce
Fresh torn mint
Parmesan cheese for passing at the table (optional) 
Other:  Cooking spray

Directions:

Preheat oven to 250 degrees F.

Marinate the pork chops in the Italian dressing for at least twenty minutes; longer if you have the time.   

Remove from marinade (discard remainder) - sprinkle the pork chops with the grill seasoning on both sides and place them into a hot skillet coated with cooking spray.  

Cook on one side for about two minutes and turn.  Add half of the lemon juice to the pan with the pork chops.Place the chops into a 250 degree oven.  

Turn the oven heat off, and let the chops sit in the oven for about four minutes until cooked through.  Pork chops should be nicely browned on both sides using this method. 

Let the chops rest for a couple of minutes and then slice and keep warm.

While the chops are cooking, cook pasta per package directions, drain and reserve about 1/2 cup of the starchy cooking water.  Note:  You can add in the peas during the last 30 seconds or so of cooking to warm them through.  

Add the drained pasta and peas to a big pasta bowl.  

Mix the Mascarpone with the garlic powder and Italian seasoning, and then add it to the bowl with the hot pasta.   Add in a little of the reserved hot cooking water and the soy sauce.  Mix until combined and then stir in the sliced pork chops.  

Top with fresh mint.  


Pass cheese at the table and enjoy!

Variations:  Add in slivered cooked red onion or saute a little garlic with the pork chops for a more savory dish.  

You can also substitute chicken or a more traditional pre-cooked ham chunks.  


Thursday, April 3, 2014

Special Feature: The Food of Chile

Before I begin this post, my thoughts and prayers go out to the people of Chile of the recent earthquake.  We were not anywhere near the area where we had the earthquake, but my thoughts go out to family members of those we met in Santiago who live in that region of the country.

****************

                                          Seafood Salad at La Perla, Santiago, Chile

My husband, Dan, and I both compete in the amateur cooking contests, as you know.  As a prize for one of the contests Dan won, we were both guests of Santa Rita winery for his prize in the "Kick it Up a Nacho" contest.  Interestingly, he was a last minute entry.  We just got back this week.  What a great trip.

This post isn't going to be a travel-log.   I am not endorsing any of the establishments here.   I wanted to share some of my favorite that I had in Chile, so that you can get an idea as to what type of food to expect if you travel there.

Tonight's post will be a little different as I am not providing recipes as these are not my dishes.  But I wanted to show you the types of food that ate while there.  I will give you an idea of how these were prepared. 

I was amazed at how many American chains are in Santiago.  From fast food to Chinese, you can find it all.  But who wants to eat someplace where you can eat at home?

Let me start with my favorite meal.  As guests of the Casa Real at Santa Rita, we were treated to breakfast each day, and one lunch and two dinners at the hotel.  By far my favorite was this almond crusted salmon that we had for lunch.  Deliciously seasoned and perfectly. It was served with peeled, boiled potatoes and asparagus sautéed with translucent onion.  The almond crust was superb. 

I am going to try to recreate this dish.  I'll be posting my version very soon!


The salmon was served with a starter of pumpkin soup.  The pumpkin was pureed with other vegetables to create this delicious appetizer.  The soup was quite savory. 


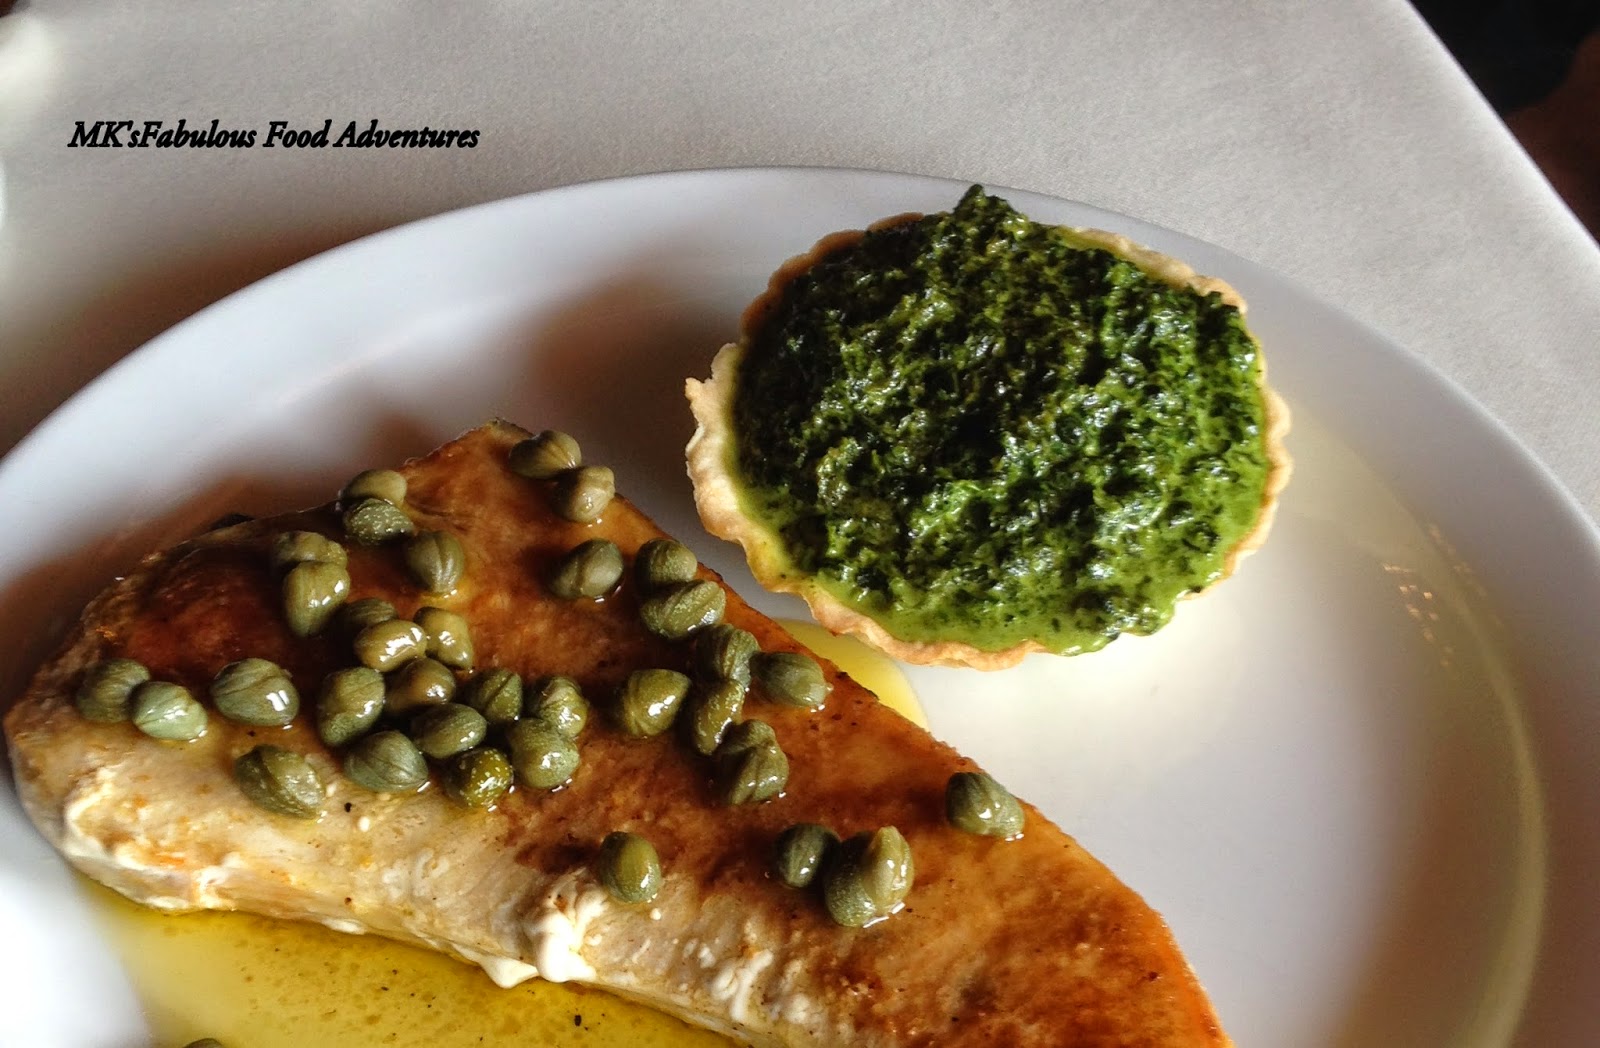
My second favorite meal on property was at the Dona Paula restaurant on the Santa Rita winery grounds, just a short walk from Casa Real.  The Dona Paula is a national monument, and is said to have housed the 120 soldiers who helped win Chile's independence.    It was a delicious swordfish with the best lemon caper butter sauce I had ever eaten.  It was served with creamed spinach pie.


At the same meal, Dan had the mushroom sauced sirloin with fries.


We also had our last night at Casa Real.  It was sirloin with sautéed mushroom and onions and accordion potatoes.  The starter for this meal with a delicious warm shrimp and zucchini salad with a lime and cilantro vinaigrette

.  

The meals at the Santiago portion of our trip were not included (except for the daily buffet breakfast offered by the hotel).  We found a wonderful local seafood restaurant at the mall called La Perla.  The seafood salad you see at the top of this page -- we liked it so much that we ate it for lunch on both Saturday and Sunday.  It was big enough to split.  We also split a plate of crab empanadas (it comes in four pieces) on Saturday.  On Sunday we tried the beef empanadas instead.  I have to say, they were good, but I preferred the crab, especially with a drizzle of the lemon oil that they bring to your table.   The sauces you see in the picture below are served with bread.  I rather enjoyed the artichoke and cilantro sauce with crusty bread.  Yum!


There were more food experiences, such as a delicious Chilean Sea bass we were served for dinner the first night at Casa Real.  I will also be posting a great Trip Advisor review about a great wine and tapas bar we found in Santiago.  The wine bar was on our own dime, and unfortunately, we dug into the tapas before thinking about taking pictures. I did get pictures of the establishment.

Finally, you're probably wondering what you get for dessert?  We had a couple of great custard dishes (with chocolate), but I found this was the most interesting.  It was type of gelatin with blueberries with a cream sauce on the side. 


As you can see, the food in Chile, while perhaps not as adventuresome as Peruvian cuisine, is heavy on seafood and beef.  At the restaurants, you can also find more traditional dishes such as seafood casserole and seafood soup.   Jellies, jams and sauces are served with freshly baked bread.  This is a sampling of what we had. 

I hope you enjoyed this culinary journey, and I'll see you soon!